
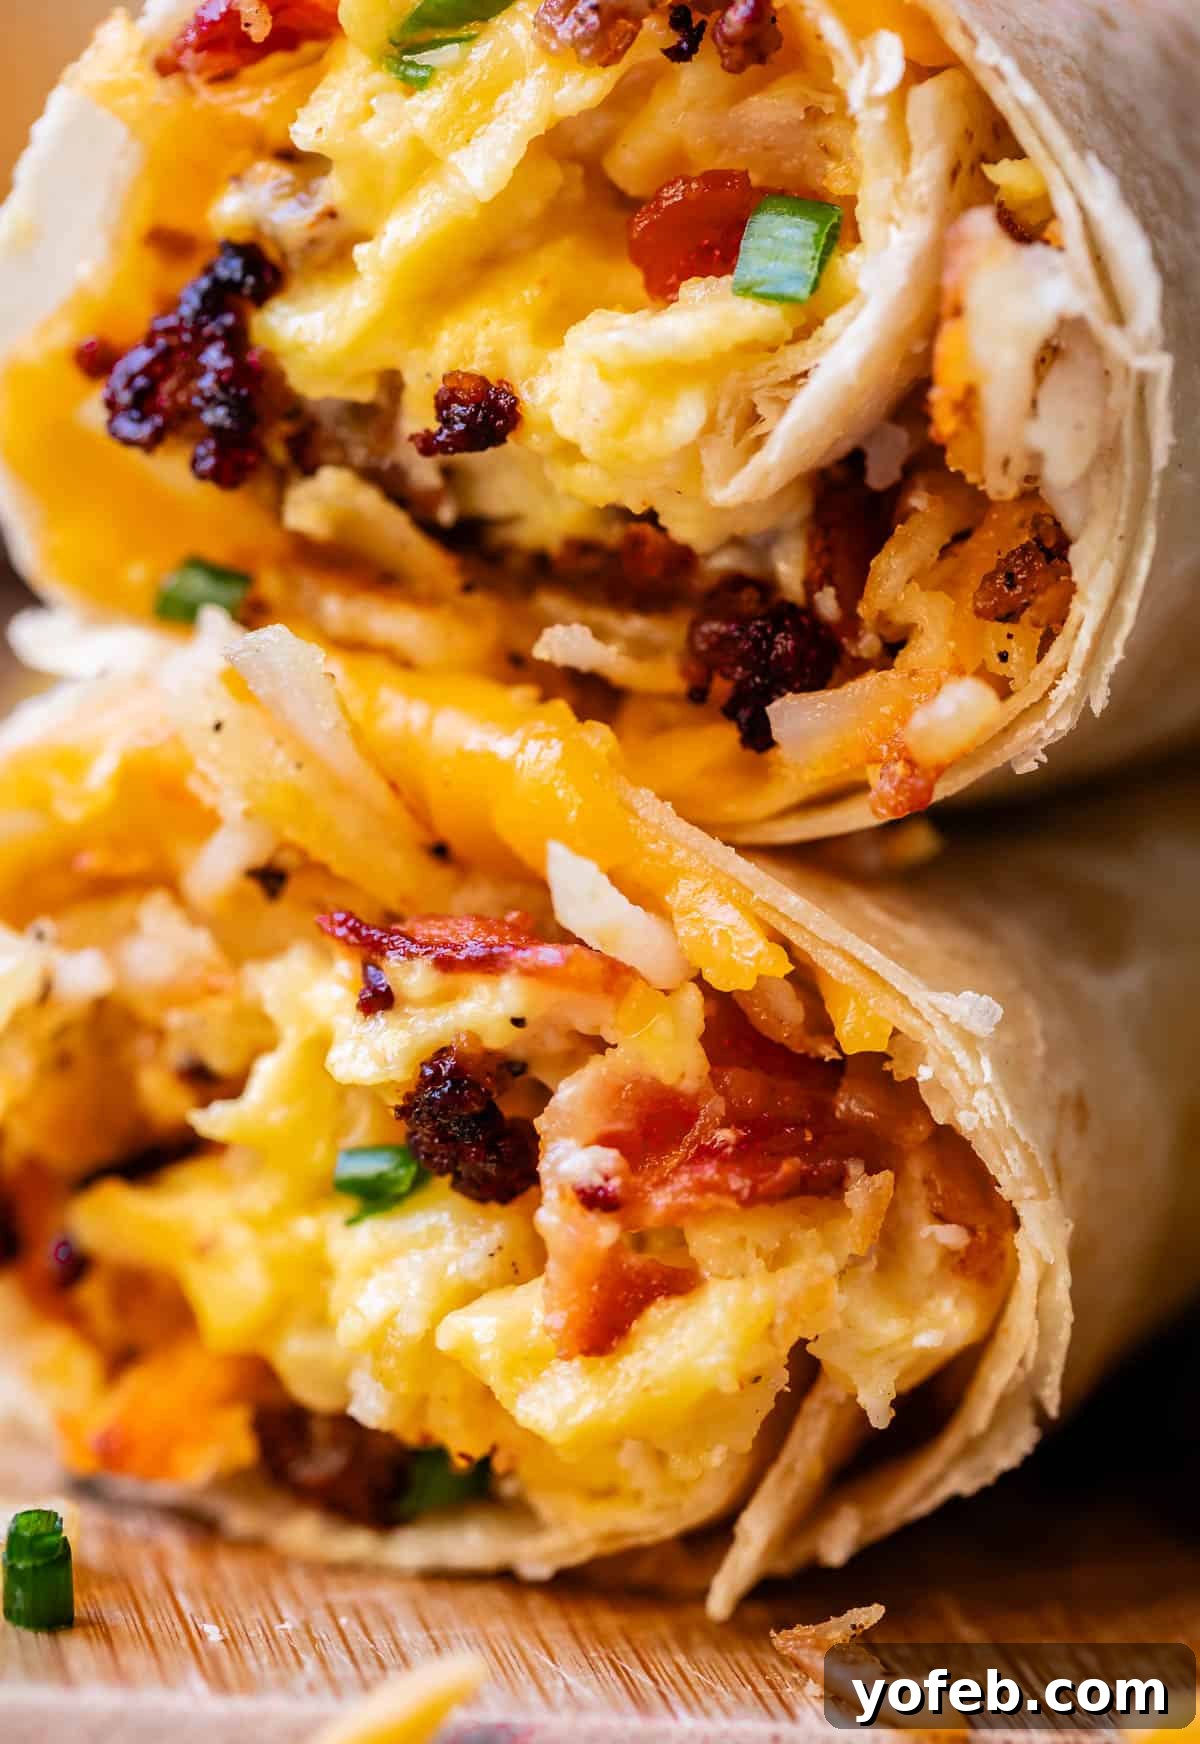
Welcome to the definitive guide for crafting the ultimate breakfast burritos! Mastering this incredible make-ahead meal will transform your mornings. The versatility is truly limitless! Here, you’ll discover all my essential tips and tricks for customizing your fillings, freezing burritos for future enjoyment, reheating them to perfection, and most importantly, elevating them with the right garnishes. Because, let’s be honest, even the finest breakfast burritos aren’t complete without their glorious toppings. Not complete, I tell you! This comprehensive guide was originally published on November 24, 2023.
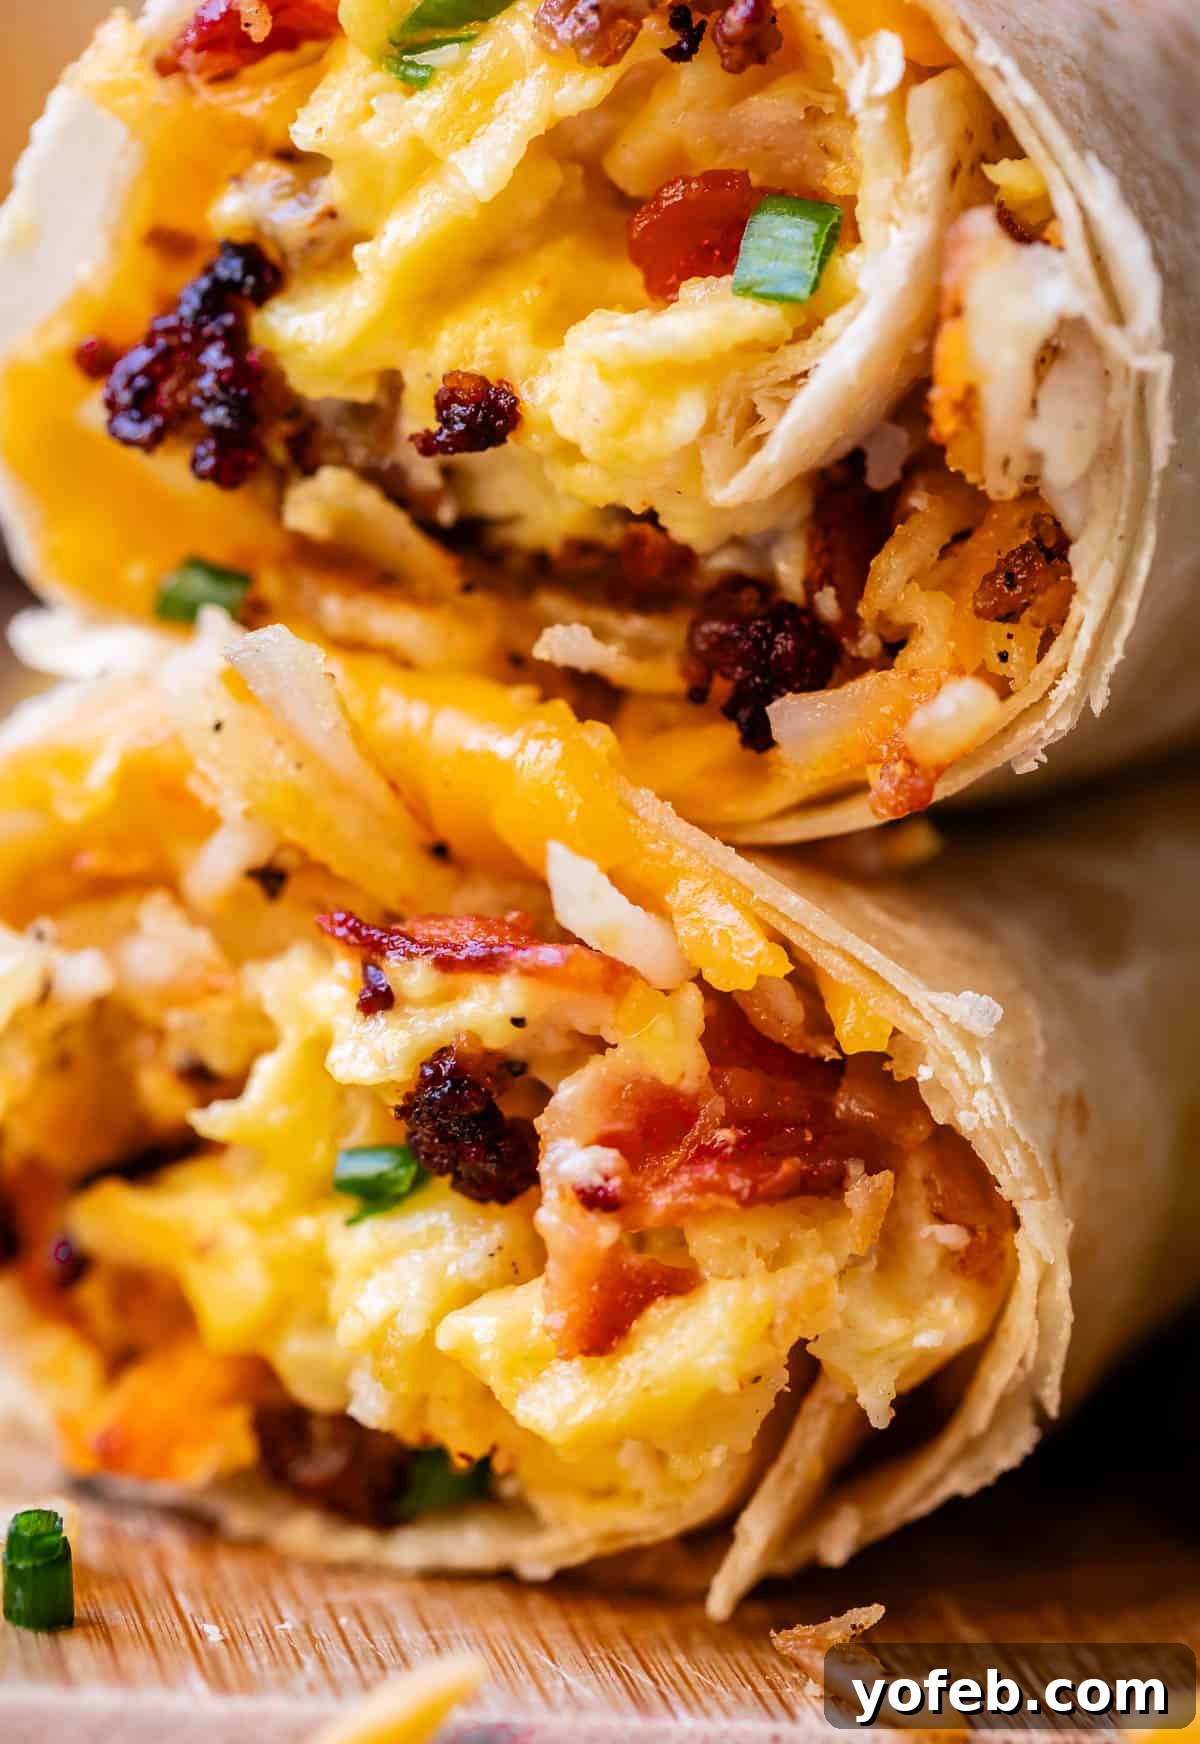
Table of Contents
- The Ultimate Make-Ahead Breakfast Burritos
- Why You Need This Breakfast Burrito Recipe
- Essential Ingredients for Perfect Breakfast Burritos
- Step-by-Step: How to Make Breakfast Burritos
- Expert Tips for Filling Your Burrito
- The Art of Folding a Burrito
- How to Properly Wrap a Burrito in Foil
- Creative Filling Ideas for Breakfast Burritos
- Irresistible Burrito Combo Suggestions
- What to Serve With Your Breakfast Burritos
- How to Store Breakfast Burritos for Freshness
- Your Guide to Freezer Breakfast Burritos
- Frequently Asked Questions About Breakfast Burritos
- More Delicious Breakfast and Brunch Ideas
- The Only Breakfast Burrito Recipe You Need
Imagine waking up, grabbing a delicious, homemade breakfast from your freezer, and having a hot, satisfying meal in minutes. That’s the magic of breakfast burritos! They’re not just for special occasions or Sunday brunch; they’re a convenient, customizable, and incredibly delicious solution for busy mornings, meal prepping, or even a quick dinner. Forget the drive-thru; with this recipe, you’re just moments away from a wholesome and flavorful meal.
The beauty of breakfast burritos lies in their adaptability. Whether you’re a meat lover, a veggie enthusiast, or somewhere in between, you can easily tailor the fillings to suit your taste. This guide will walk you through the process, from selecting the best ingredients to mastering the art of folding, ensuring your burritos are perfectly packed and never soggy. Get ready to elevate your breakfast game!
The Ultimate Make-Ahead Breakfast Burritos
In our fast-paced lives, finding time for a nutritious and delicious breakfast can often feel like a luxury. This is where the magic of make-ahead breakfast burritos truly shines. They are not just a meal; they are a game-changer for meal prep, allowing you to enjoy a gourmet breakfast experience without the morning rush. Imagine grabbing a perfectly crafted burrito from your freezer, popping it into the microwave or oven, and savoring a warm, flavorful meal that fuels your day.
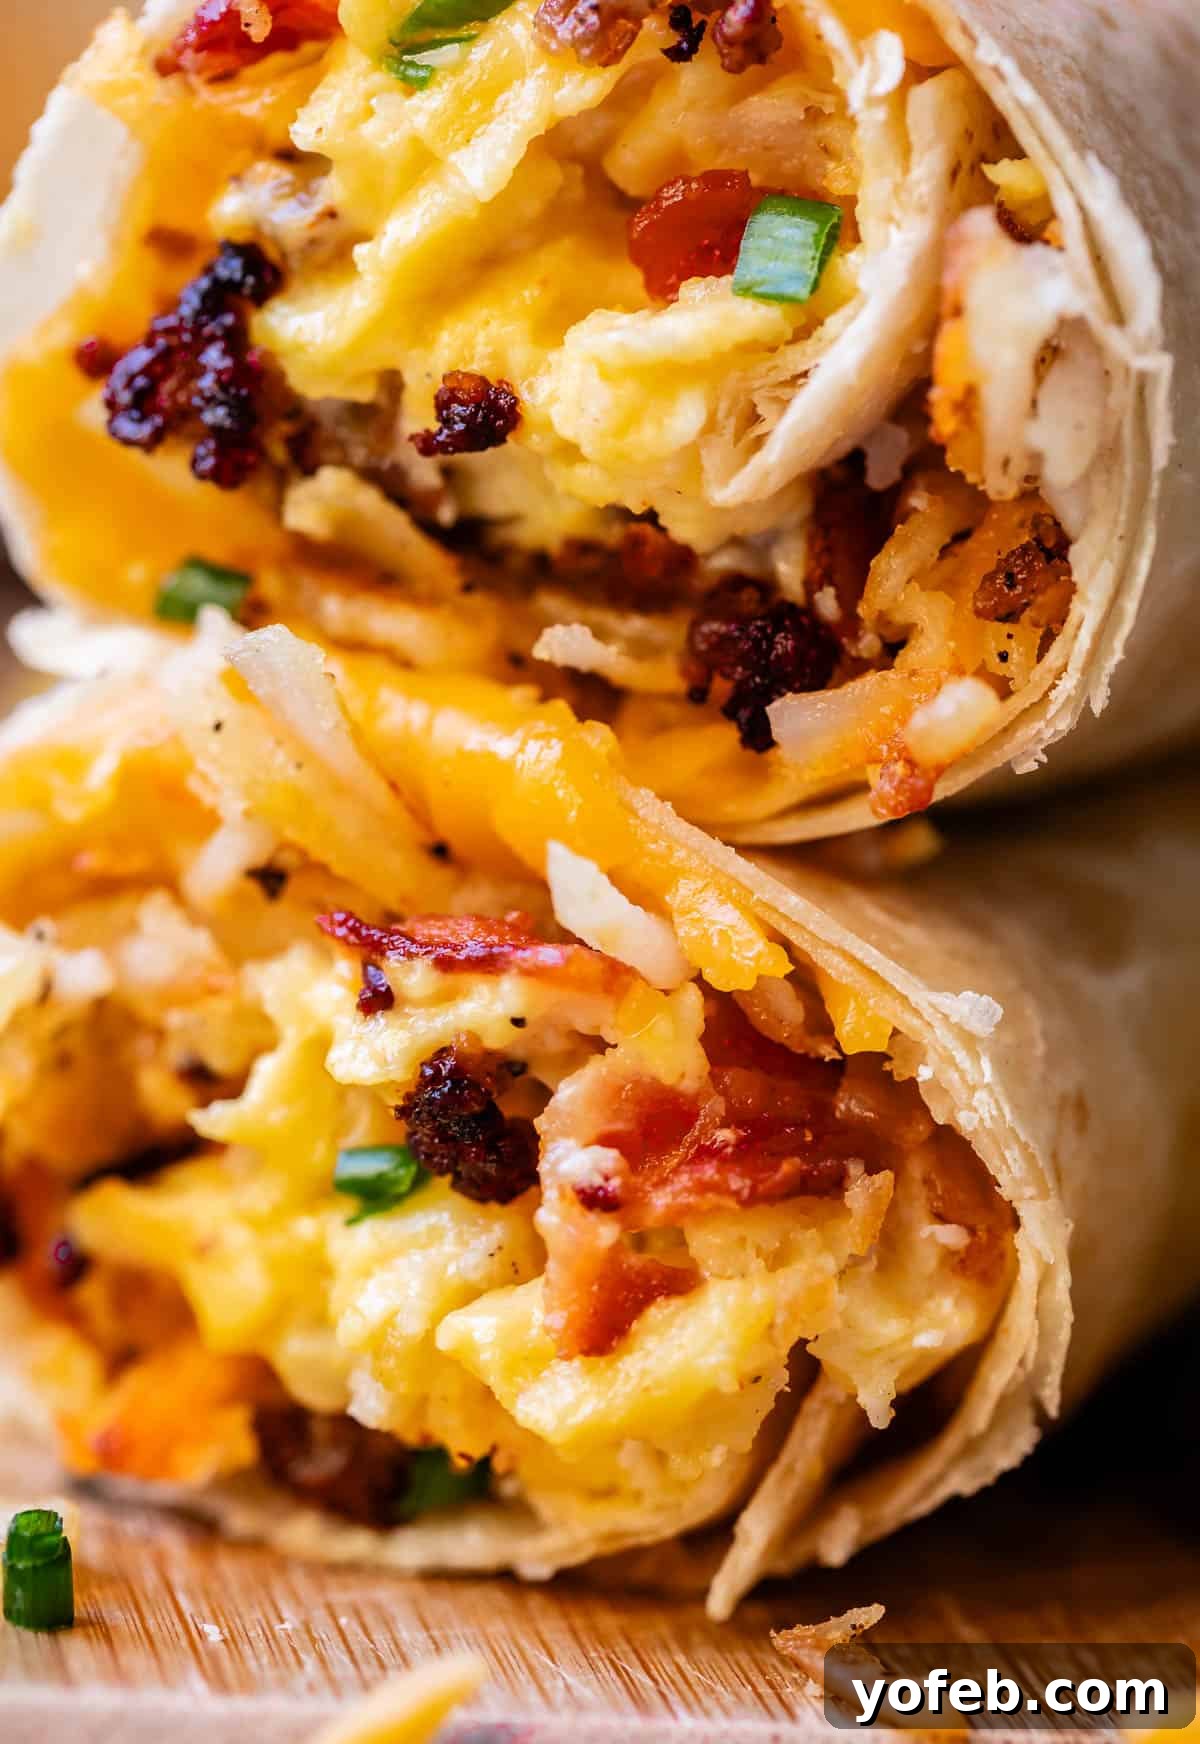
These burritos are designed for convenience without compromising on taste or quality. By preparing a batch on the weekend, you unlock a week’s worth of stress-free breakfasts. It’s an ideal solution for busy professionals, parents juggling school mornings, or anyone who simply loves a hearty breakfast but lacks the time to cook from scratch every day. This recipe ensures that every bite is packed with delicious ingredients, from crispy bacon and savory sausage to creamy eggs and golden hash browns, all encased in a soft, warm tortilla.
Why You Need This Breakfast Burrito Recipe
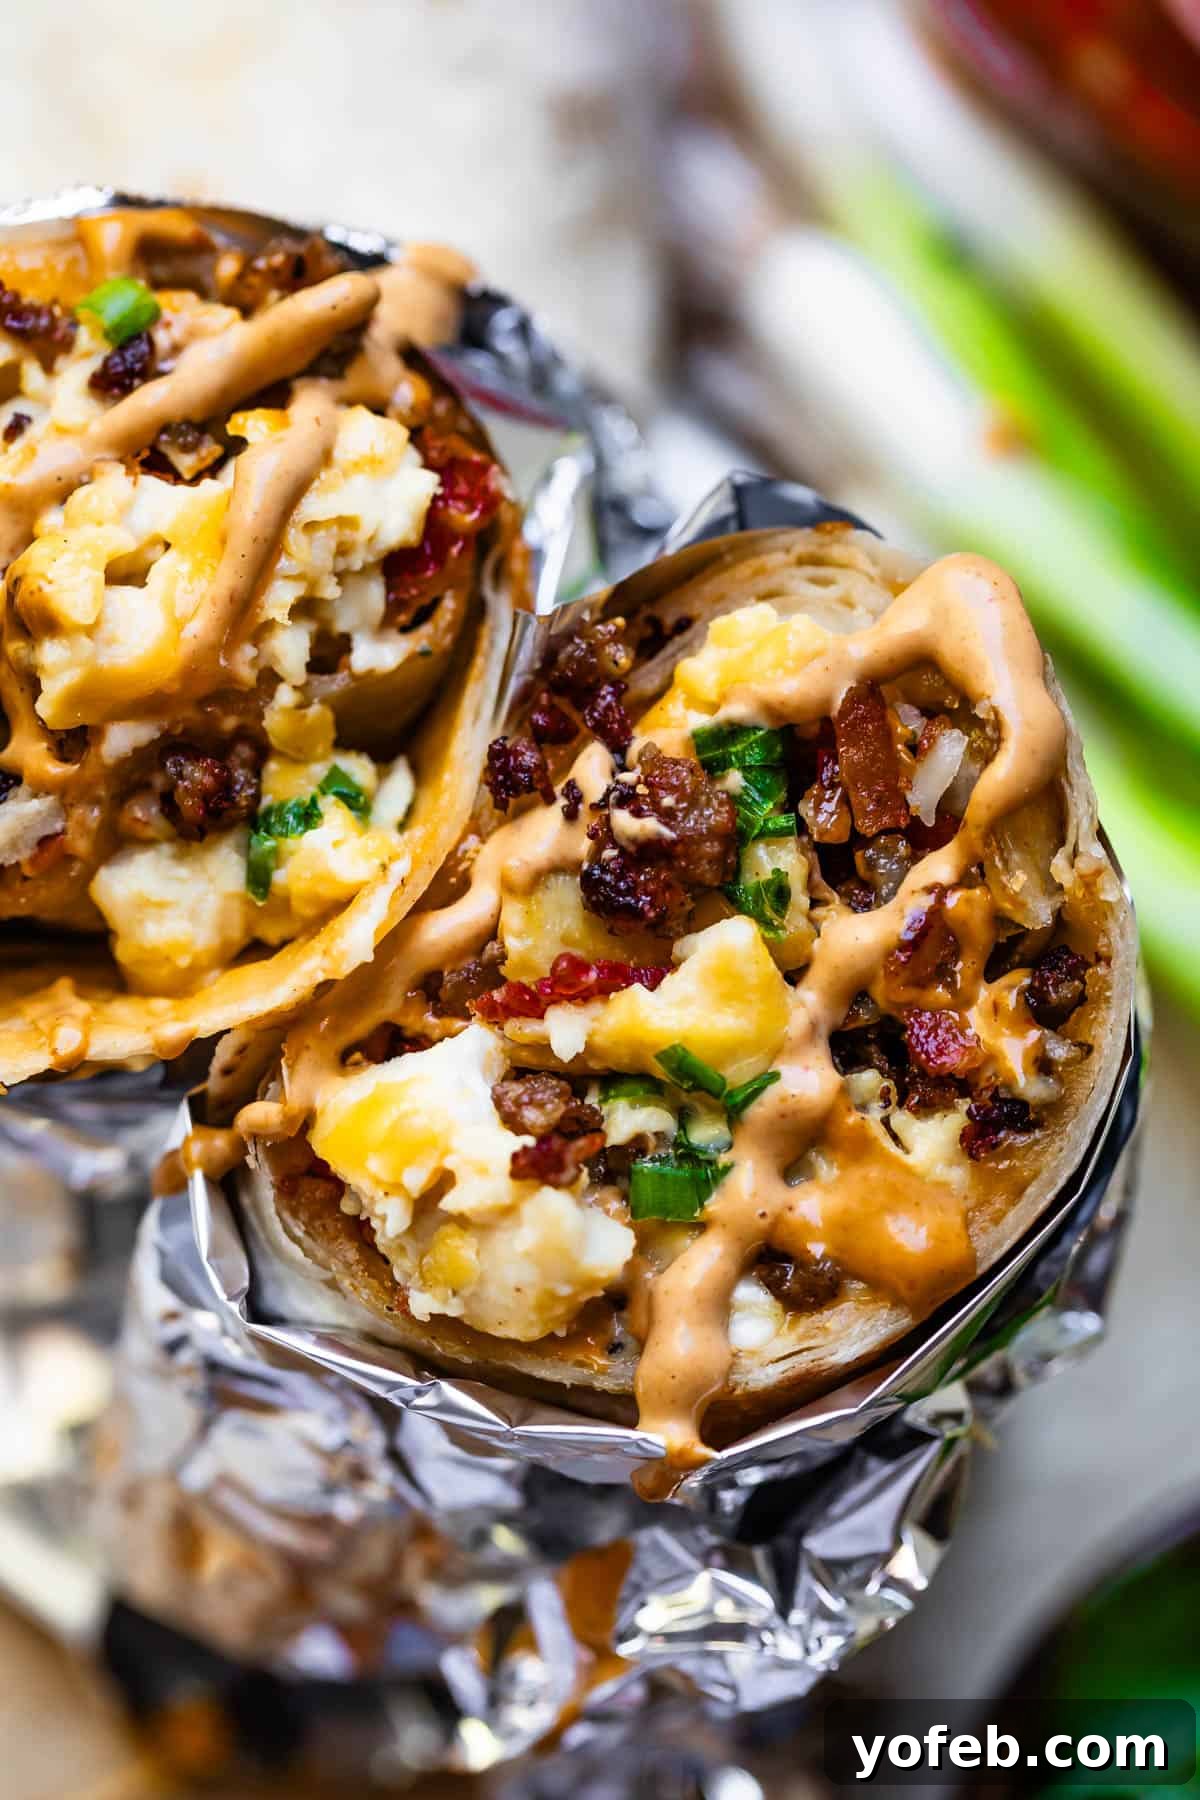
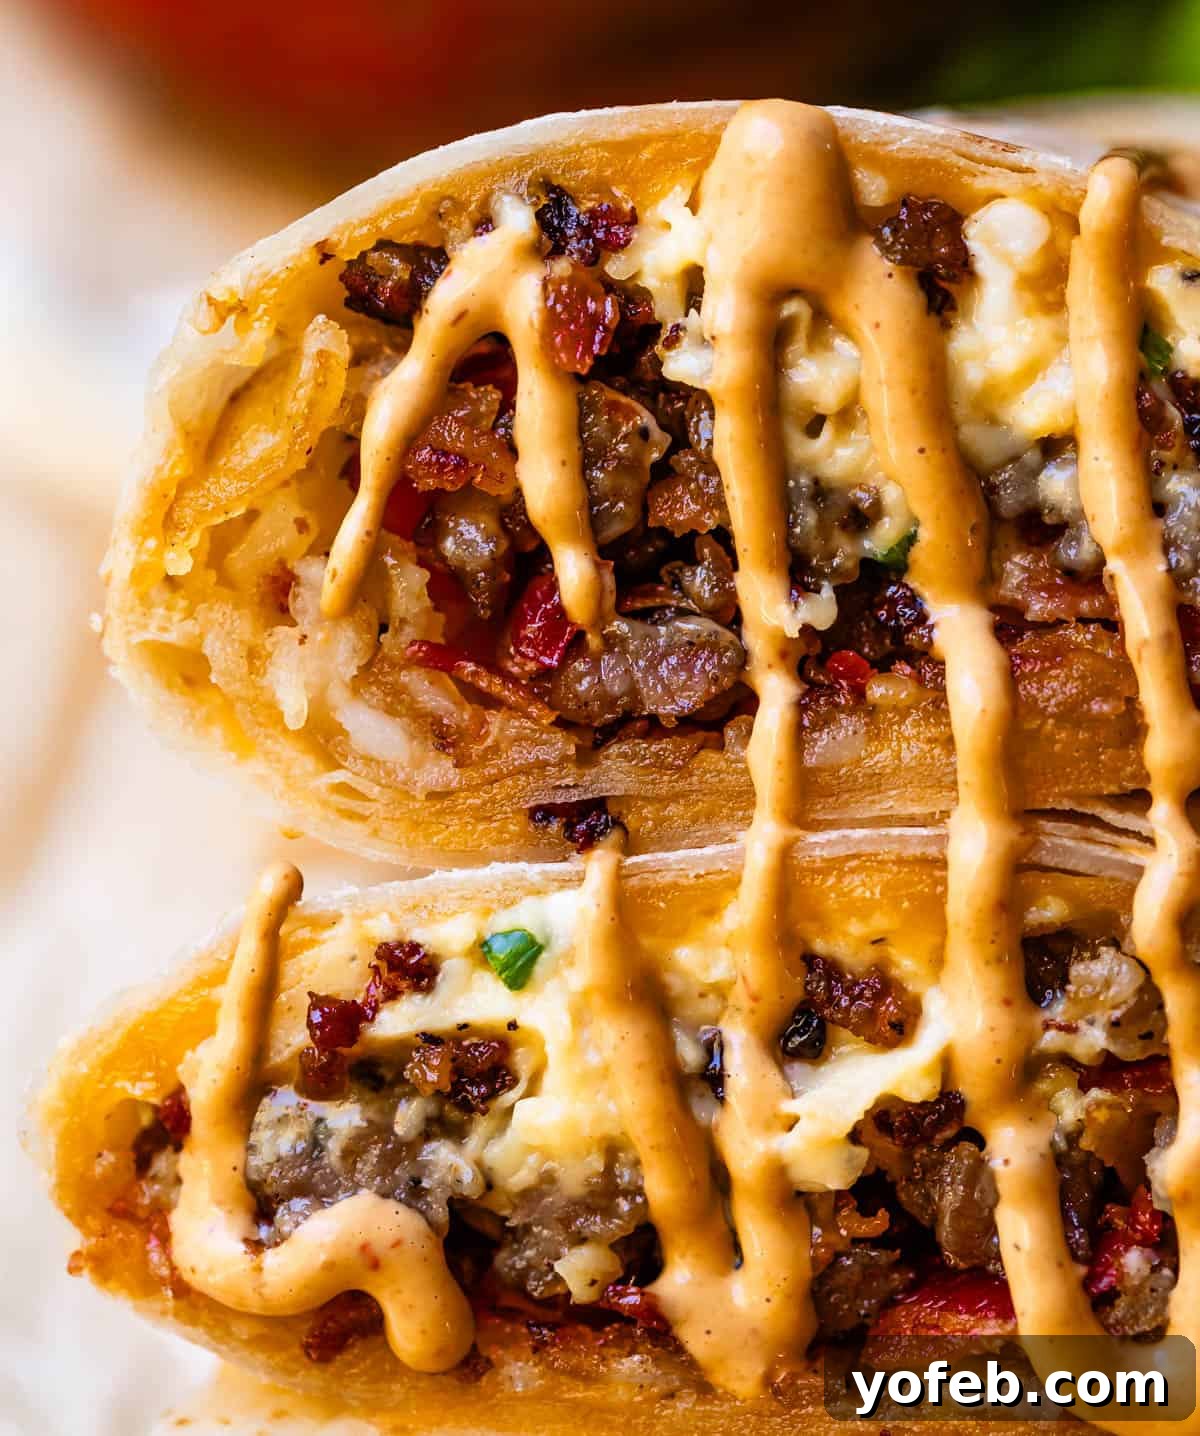
Everyone adores a well-crafted breakfast burrito, don’t they? For me, they’re always a top choice at any brunch spot because they skillfully combine all the best elements of breakfast, generously doused in a delightful sauce, and enveloped in a warm, comforting carbohydrate shell. What’s not to love about that?
This recipe provides my favorite foundational version, a classic combination that serves as the perfect starting point. From here, you can venture into countless ingredient variations (and I’ll share plenty of creative combo ideas below). But for building that ultimate, satisfying breakfast burrito, here’s why these core components are a must-have:
Essential Ingredients for Perfect Breakfast Burritos
Crafting a truly exceptional breakfast burrito starts with understanding the role each ingredient plays. This recipe focuses on classic flavors, but with expert tips to maximize their deliciousness. Here’s a closer look at what goes into our perfect burritos:
- Bacon: I always recommend baking your bacon instead of frying it. It’s significantly easier to manage, produces less mess, and allows for even crisping. Crucially, remember to save the bacon grease! This golden liquid is packed with flavor and will be your secret weapon for making incredibly crispy hash browns and even savory pancakes later.
- Breakfast Sausage: Cook your sausage until it’s beautifully browned and slightly crisp. Achieving those caramelized bits adds an incredible depth of flavor and texture to your burrito. Look for a good quality bulk breakfast sausage for the best results.
- Cheese: While many cheeses work, classic sharp cheddar remains my top choice for its robust flavor and excellent melting properties. Other fantastic options include Gouda, Pepper Jack for a spicy kick, or Colby Jack. The most vital tip for cheese is to shred it yourself at home. Pre-shredded cheeses often contain anti-caking agents that prevent them from sticking together, and more importantly, from melting smoothly within your burrito. Hand-shredded cheese acts as a natural “burrito glue,” holding all your delicious fillings together perfectly.
- Hash Browns: Yes, we are already using a tortilla, but these aren’t diet food – they’re comfort food! Embrace the glorious double-carb moment. Incorporating crispy hash browns is absolutely non-negotiable for that satisfying crunch and hearty texture. And guess what? We’ll achieve that irresistible crispiness by cooking them in that saved bacon grease! This step takes your hash browns from good to unbelievably delicious.
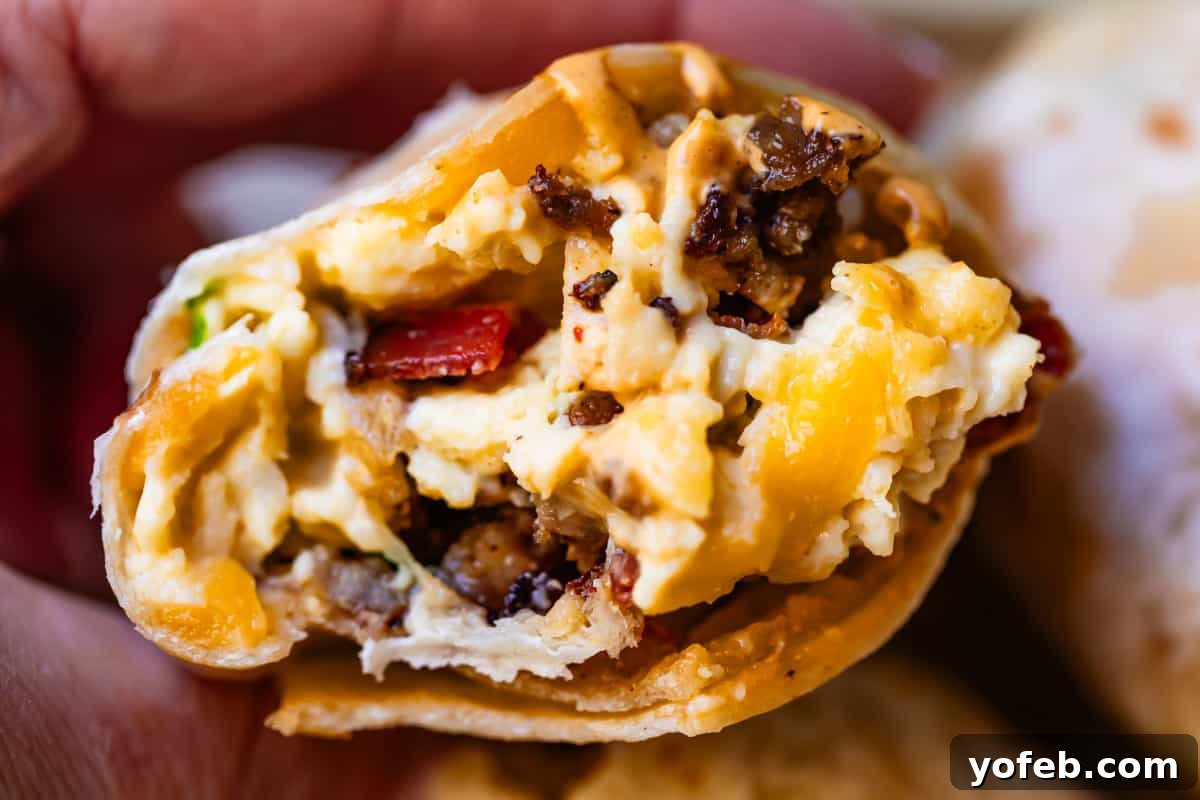
- Eggs: The secret to perfect eggs for burritos is to cook them incredibly slowly. You want super creamy, soft, almost custard-like eggs, not dry or rubbery ones. To achieve this, we’re adding a touch of cream cheese, which melts into the eggs, creating an unbelievably rich and tender texture that stands up beautifully to reheating. All the specific cooking details are outlined in the recipe below.
- Tortillas: Size matters! Aim for a “Goldilocks” tortilla – not too small, which will cause fillings to spill out, and not too large, which can lead to an overwhelming amount of plain tortilla. A 10-12 inch or “burrito” size is generally ideal. For smaller appetites or kids, soft taco-sized tortillas work, but be mindful that you won’t fit as much filling. Flour tortillas are the best choice as they are pliable, durable, and less likely to crack than corn tortillas. Always ensure your tortillas are fresh; older, drier tortillas are prone to tearing. And a crucial final tip: warm your tortillas before assembly to make them extra flexible and easy to roll. We’ll cover warming methods later on.
- Assembly Matters: No Soggy Burritos! This is my ultimate breakfast burrito mantra. The order of layering is critical: start with cheese directly on the tortilla to create a protective barrier against wetter ingredients like eggs. I take it a step further by briefly melting the cheese onto the tortilla before adding anything else. If you plan to eat your burritos immediately, hot fillings can go right on top of the melted cheese. However, if you’re refrigerating or freezing them, allow all fillings to cool completely before assembly. This prevents steam and excess moisture from making your tortillas soggy. Lastly, resist the urge to overstuff! A moderately filled burrito is easier to roll and less likely to burst. Let’s get cooking!
Ingredients for Breakfast Burritos
Here’s a concise list of the ingredients you’ll need to gather for these incredible breakfast burritos. Many of these you might already have on hand! Having everything prepped and ready will make the assembly process incredibly quick and smooth. For precise measurements and step-by-step cooking instructions, please refer to the detailed recipe card at the end of this post.
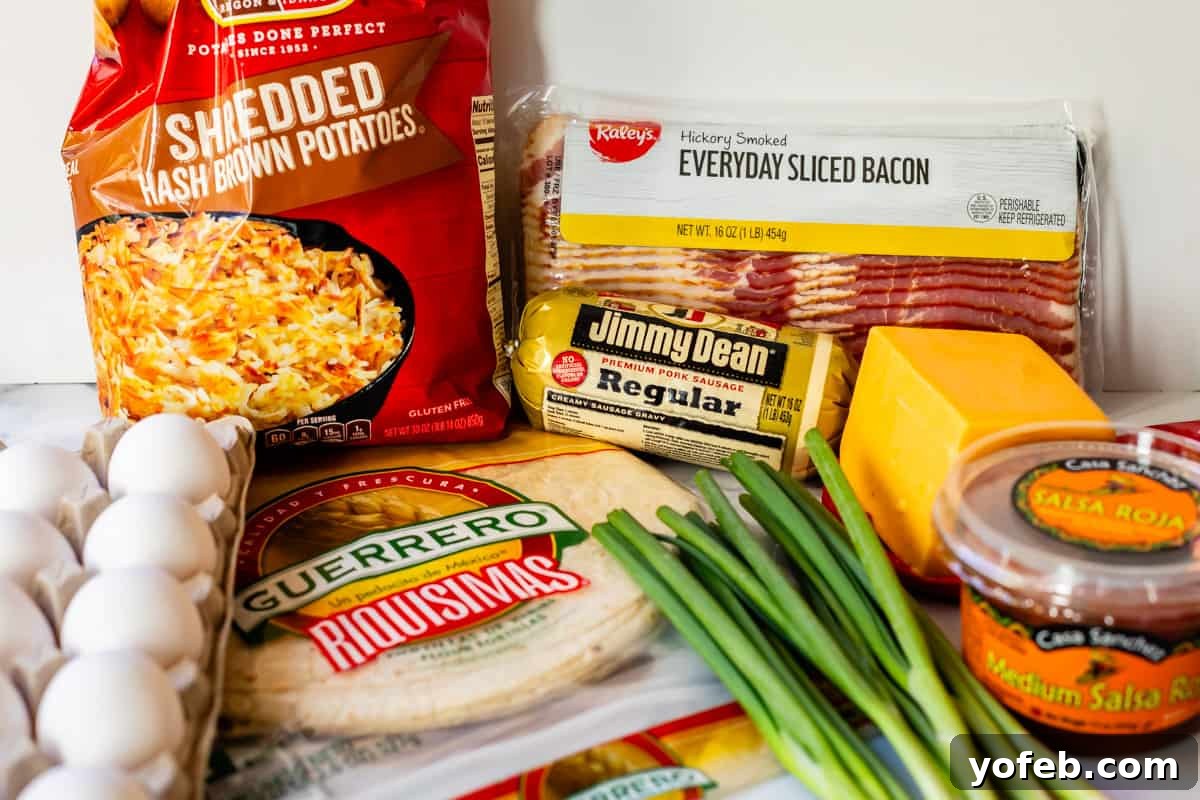
- Bacon
- Breakfast Sausage
- Cheddar Cheese
- Frozen Shredded Hash Browns
- Butter
- Kosher Salt
- Cream Cheese
- Avocado (for serving)
- Fresh Cilantro (for serving)
- Large Flour Tortillas
- Large Eggs
- Green Onions
- Lawry’s Seasoning Salt
- Onion Powder
- Black Pepper
- Chipotle Mayo (for serving)
- Restaurant Style Salsa (for serving)
Step-by-Step: How to Make Breakfast Burritos
Let’s dive into the cooking process to prepare each component for your ultimate breakfast burritos. Efficiency is key here, so multi-tasking where possible will speed things up!
First, we begin with the bacon. My preferred method is always to bake bacon in the oven. It’s incredibly simple, produces evenly crisp results, and minimizes mess compared to stovetop frying.
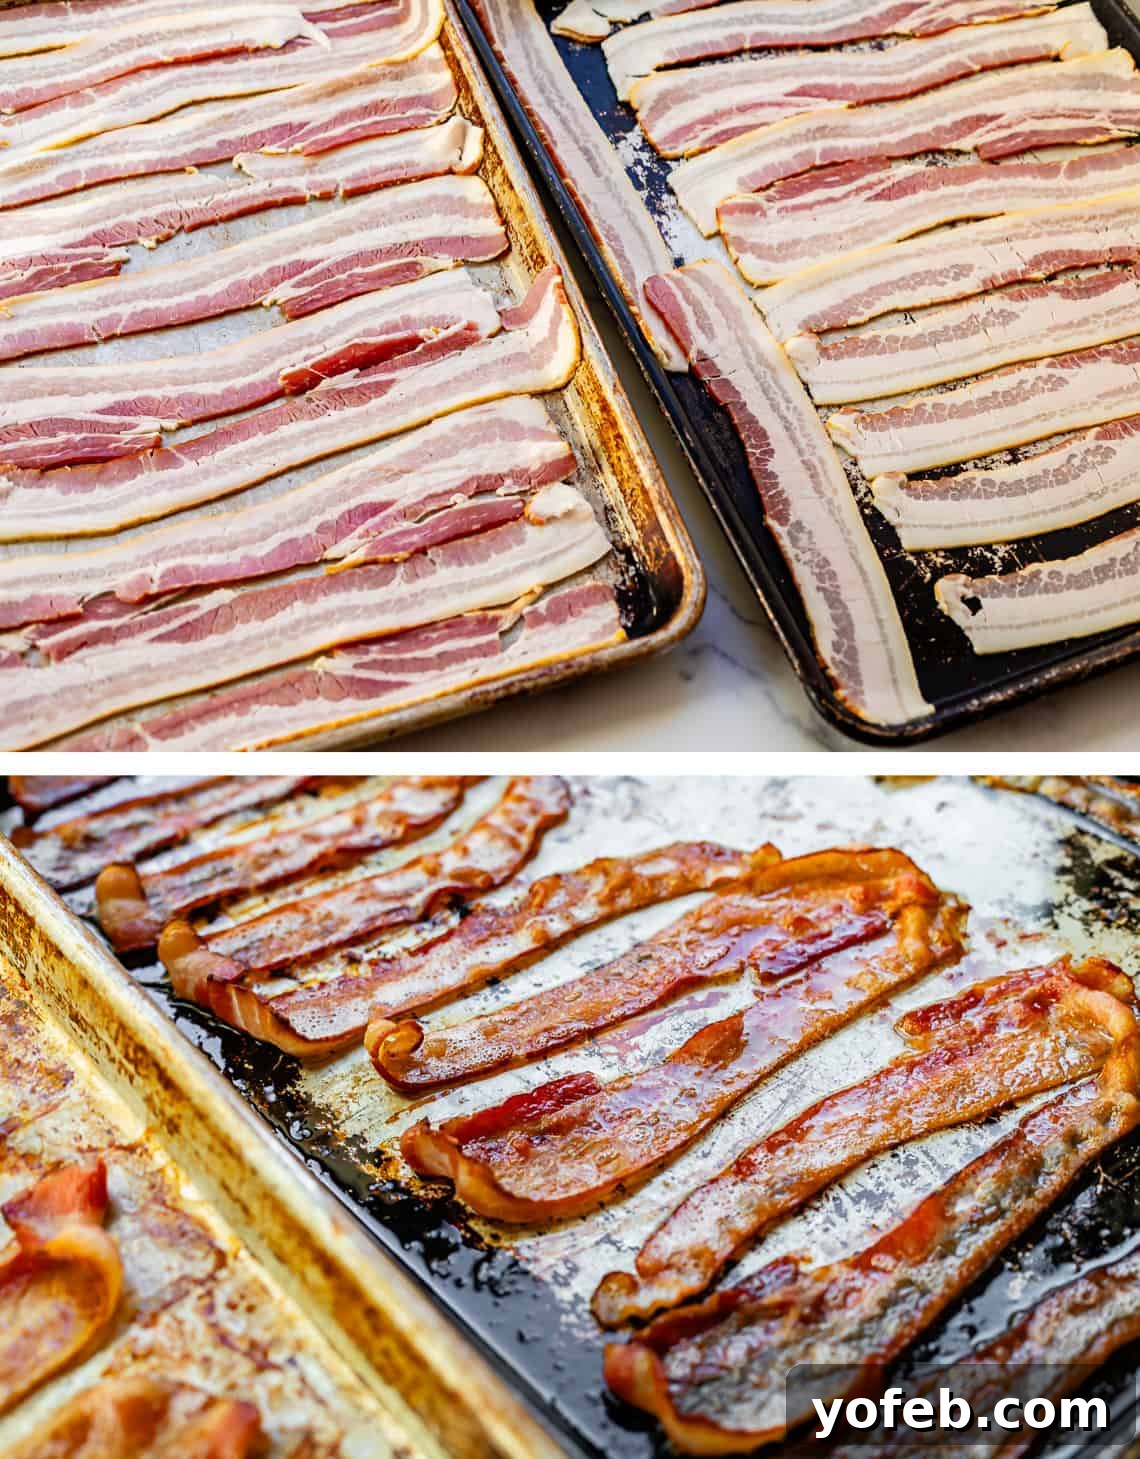
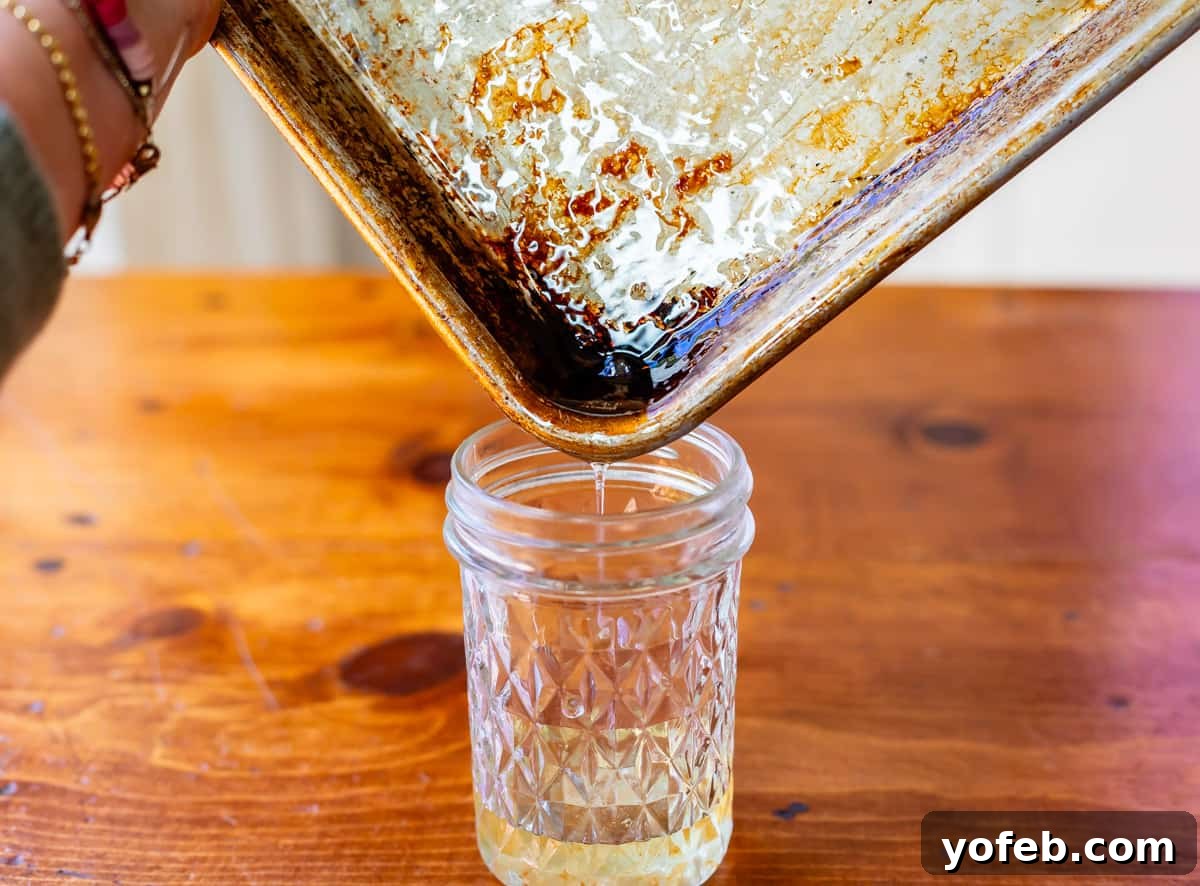
A crucial step: make sure to save that precious bacon grease! I collect it in a jar and store it in the fridge. This “liquid gold” isn’t just for hash browns; it’s fantastic for adding savory depth to many dishes, even pancakes!
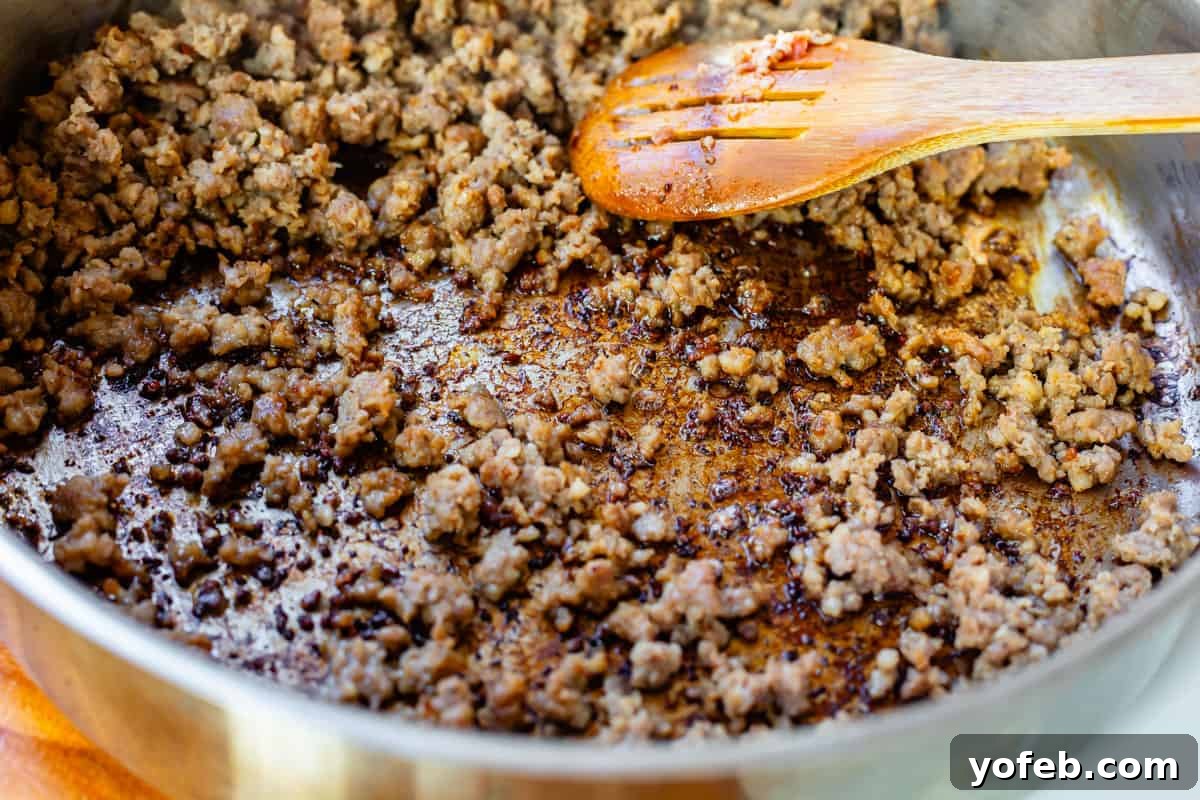
Next, let’s cook the breakfast sausage. I particularly enjoy the crispy, browned bits that form when cooking sausage. To maximize these flavorful morsels, here’s a little hack: once your sausage is mostly cooked through, push the majority of it to one side of the pan. Then, spread out a thin, single layer of sausage bits over the exposed pan surface and let it cook undisturbed for a minute or two until beautifully browned and crisp. Scrape these to the side with the rest of the sausage and repeat with any remaining uncooked portions. This technique guarantees maximum flavor and texture, though it’s an optional step if you’re short on time.
Now for the hash browns. Here’s my hot tip for truly superior hash browns: use that saved bacon grease! It imparts an incredible savory flavor and ensures an unparalleled level of crispiness. Prepare to be amazed by the golden, crunchy perfection you achieve with this simple swap.
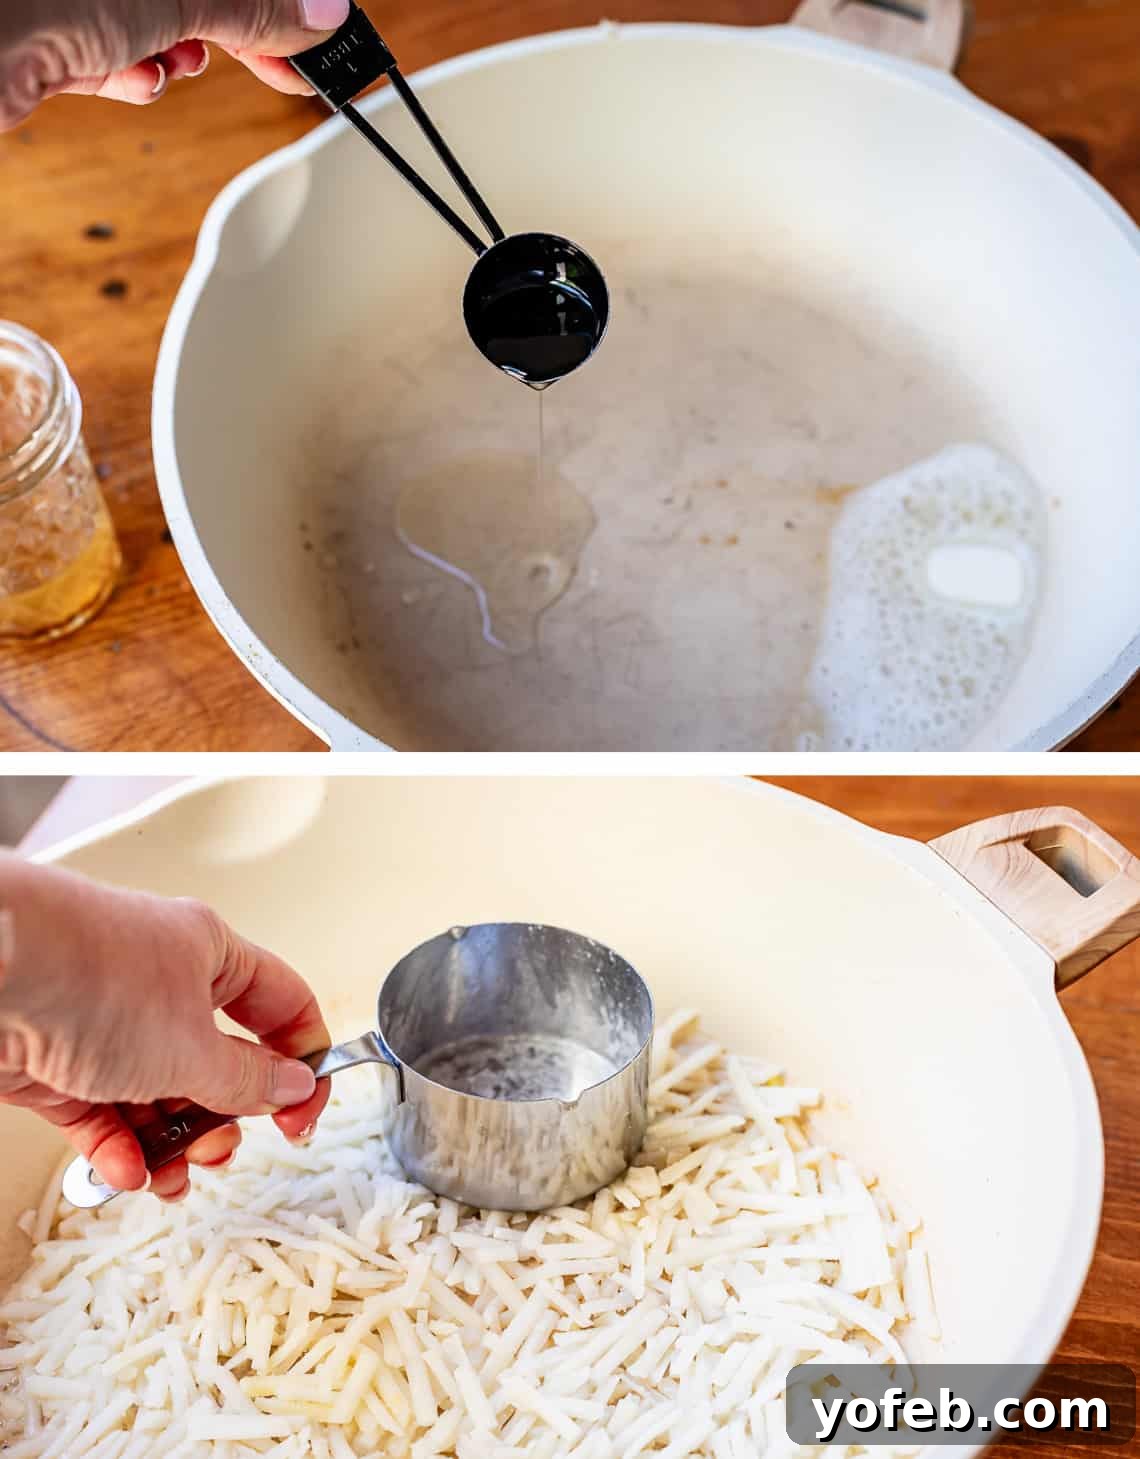
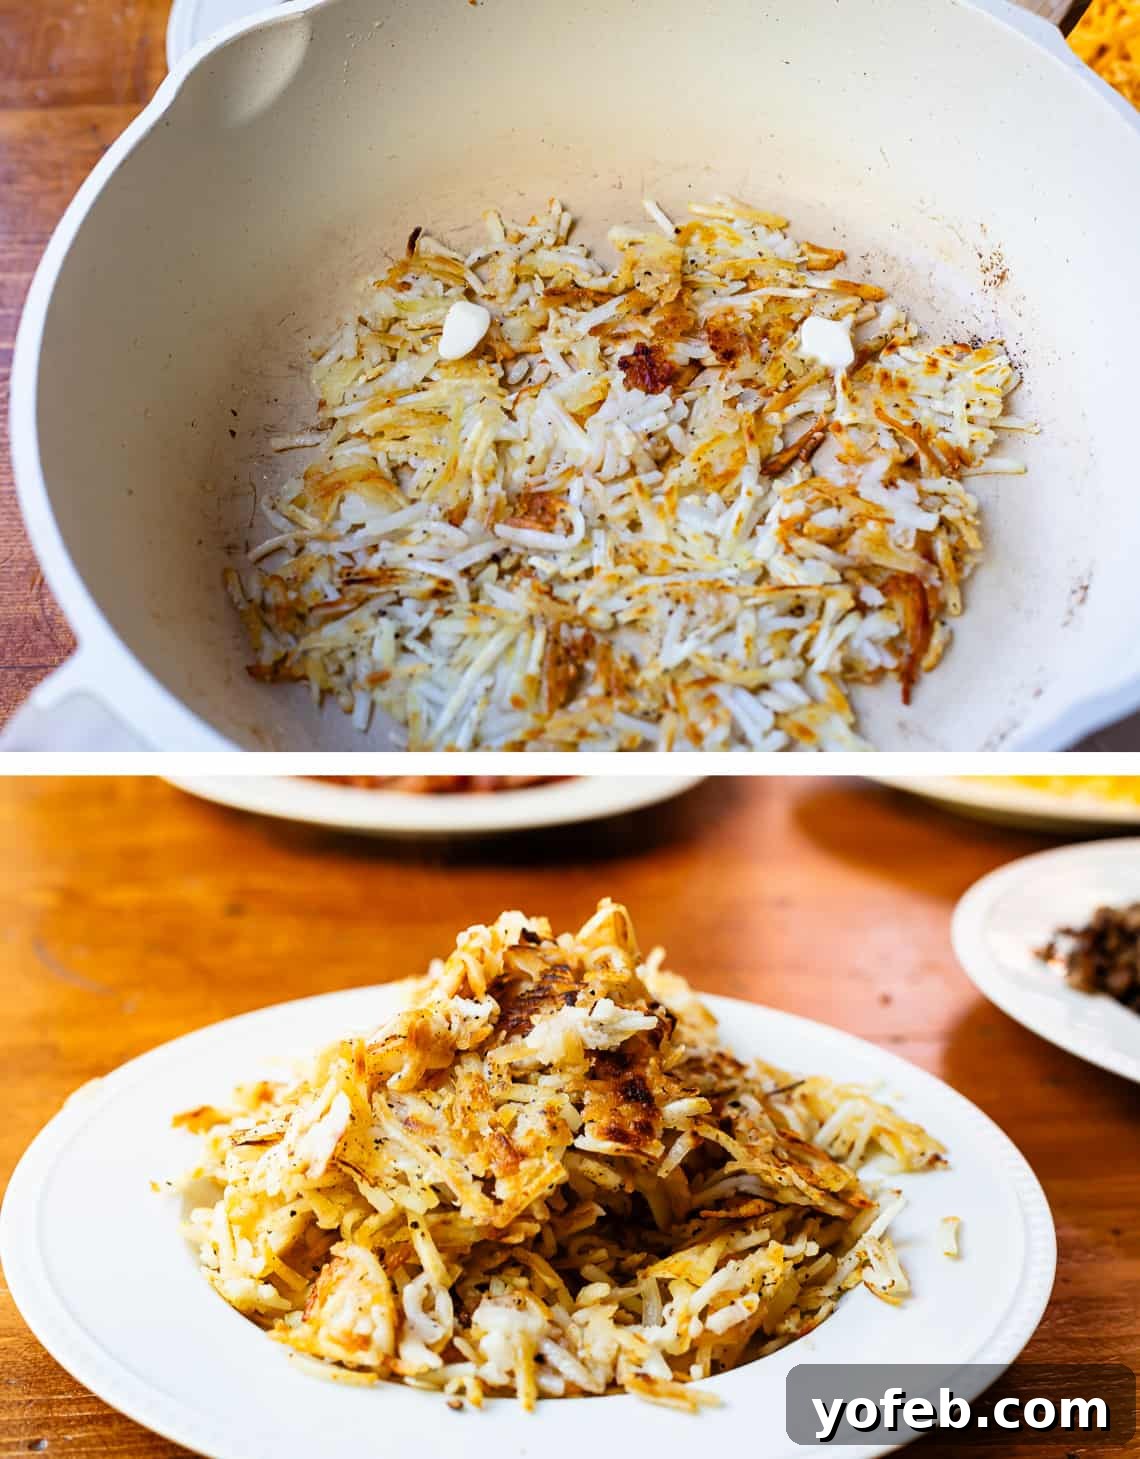
When cooking your hash browns, don’t just dump them in. Pack your potatoes down firmly with a spatula or the back of a measuring cup. You want to create a compact “potato pancake” that can be flipped in sections rather than stirred. Allow each side to cook undisturbed until deep golden brown and crispy. This packing method is crucial for achieving that desirable crunchy crust. If you notice any areas looking dry or cooking too quickly, add a small pat of butter directly on top of that spot; it will melt down and distribute the fat evenly.
Finally, it’s time for the eggs. Crack all your eggs into a bowl. A common misconception is to add milk, but this often just waters down the eggs. Instead, we’re aiming for a rich, creamy texture without dilution. Whisk them thoroughly until frothy.
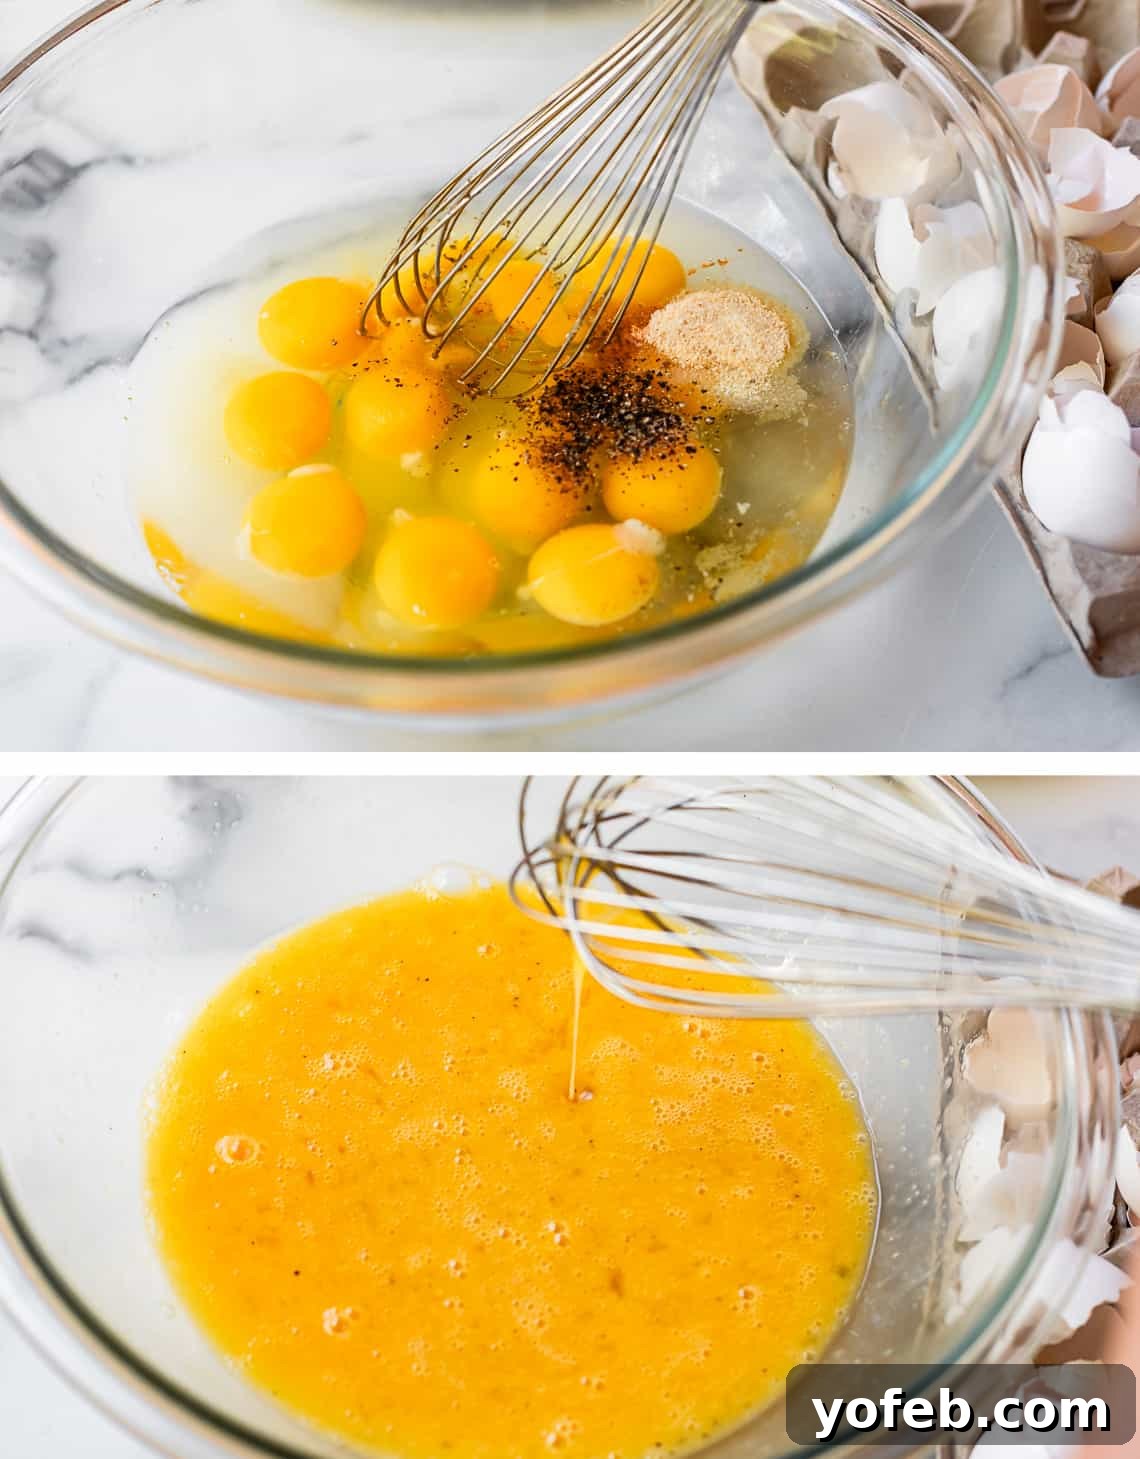
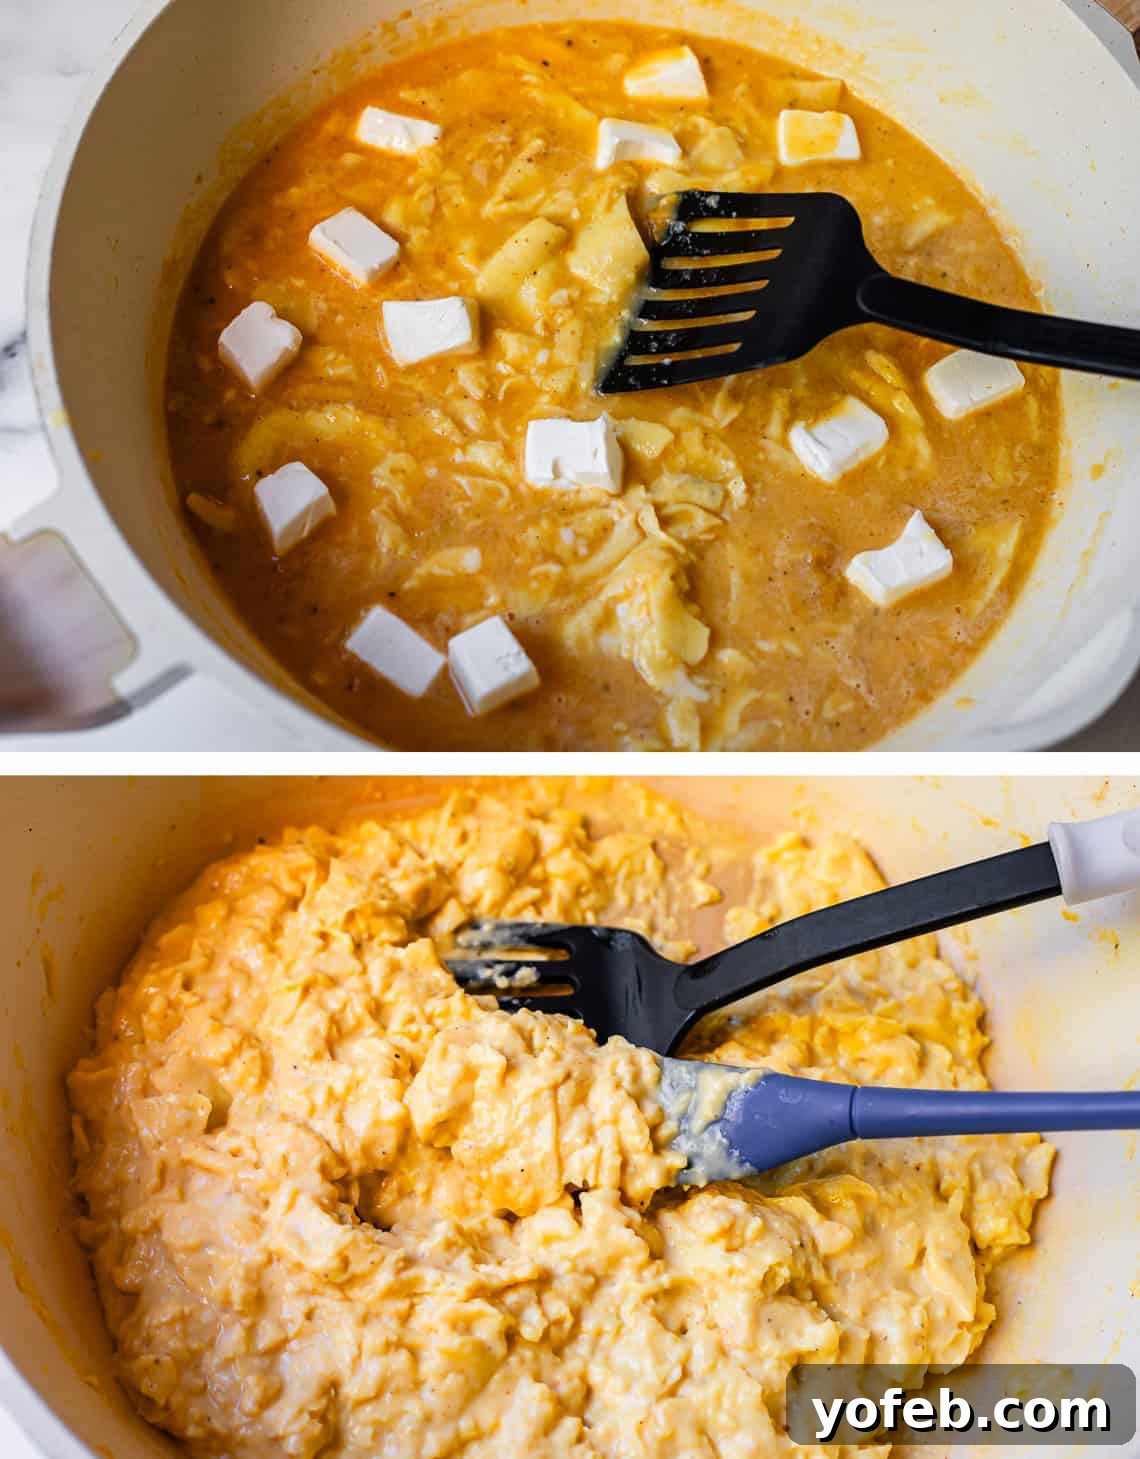
The golden rule for these burrito eggs is to cook them very, very slowly. The slower the better, as this technique ensures they remain incredibly soft and creamy – a stark contrast to the dry, overcooked eggs that can ruin a burrito. When the eggs are about halfway set and still quite moist, incorporate chunks of cream cheese. This addition is pure genius, melting into the eggs to create an unbelievably smooth and luxurious texture. This slow-cooking method, combined with the cream cheese, guarantees the most amazing, tender eggs that will hold up beautifully when reheated inside your burritos. Once cooked, let all your components cool completely before assembly to prevent sogginess.
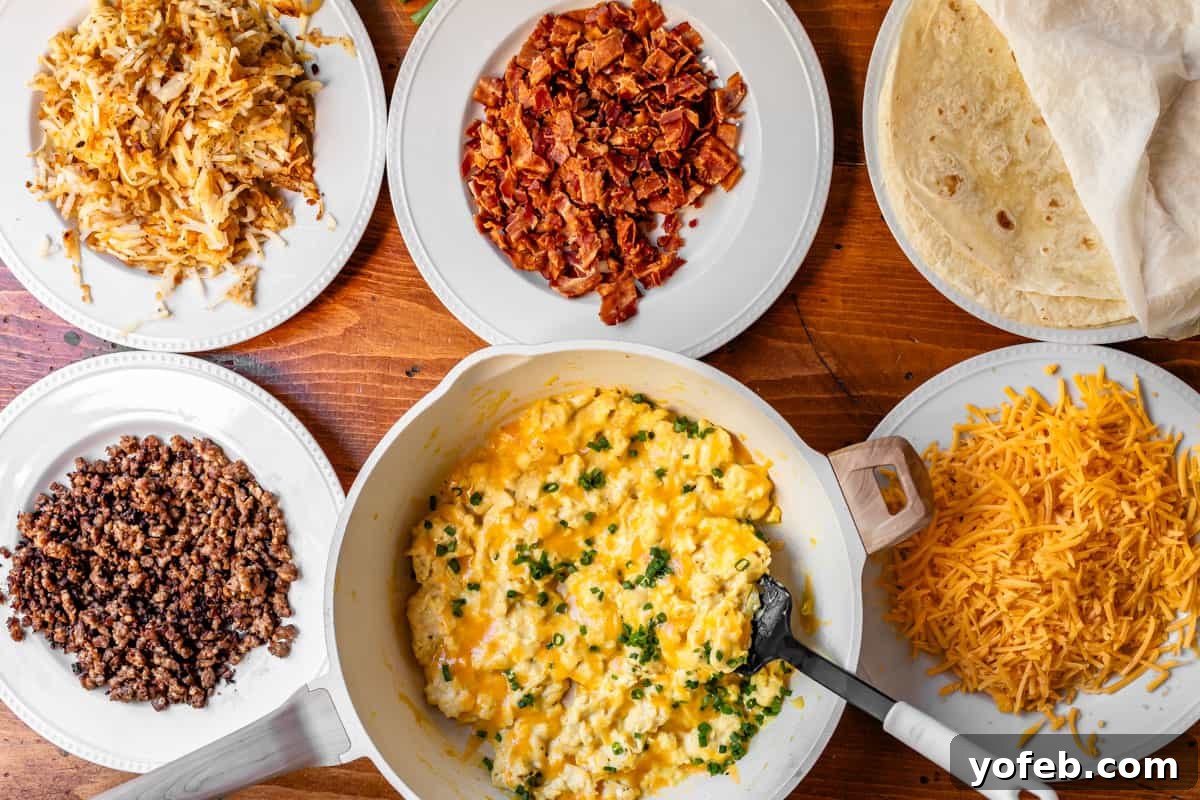
With all your fillings prepared and cooled, line them up like an assembly line. This preparation makes the burrito-rolling process swift and efficient!
Expert Tips for Filling Your Burrito
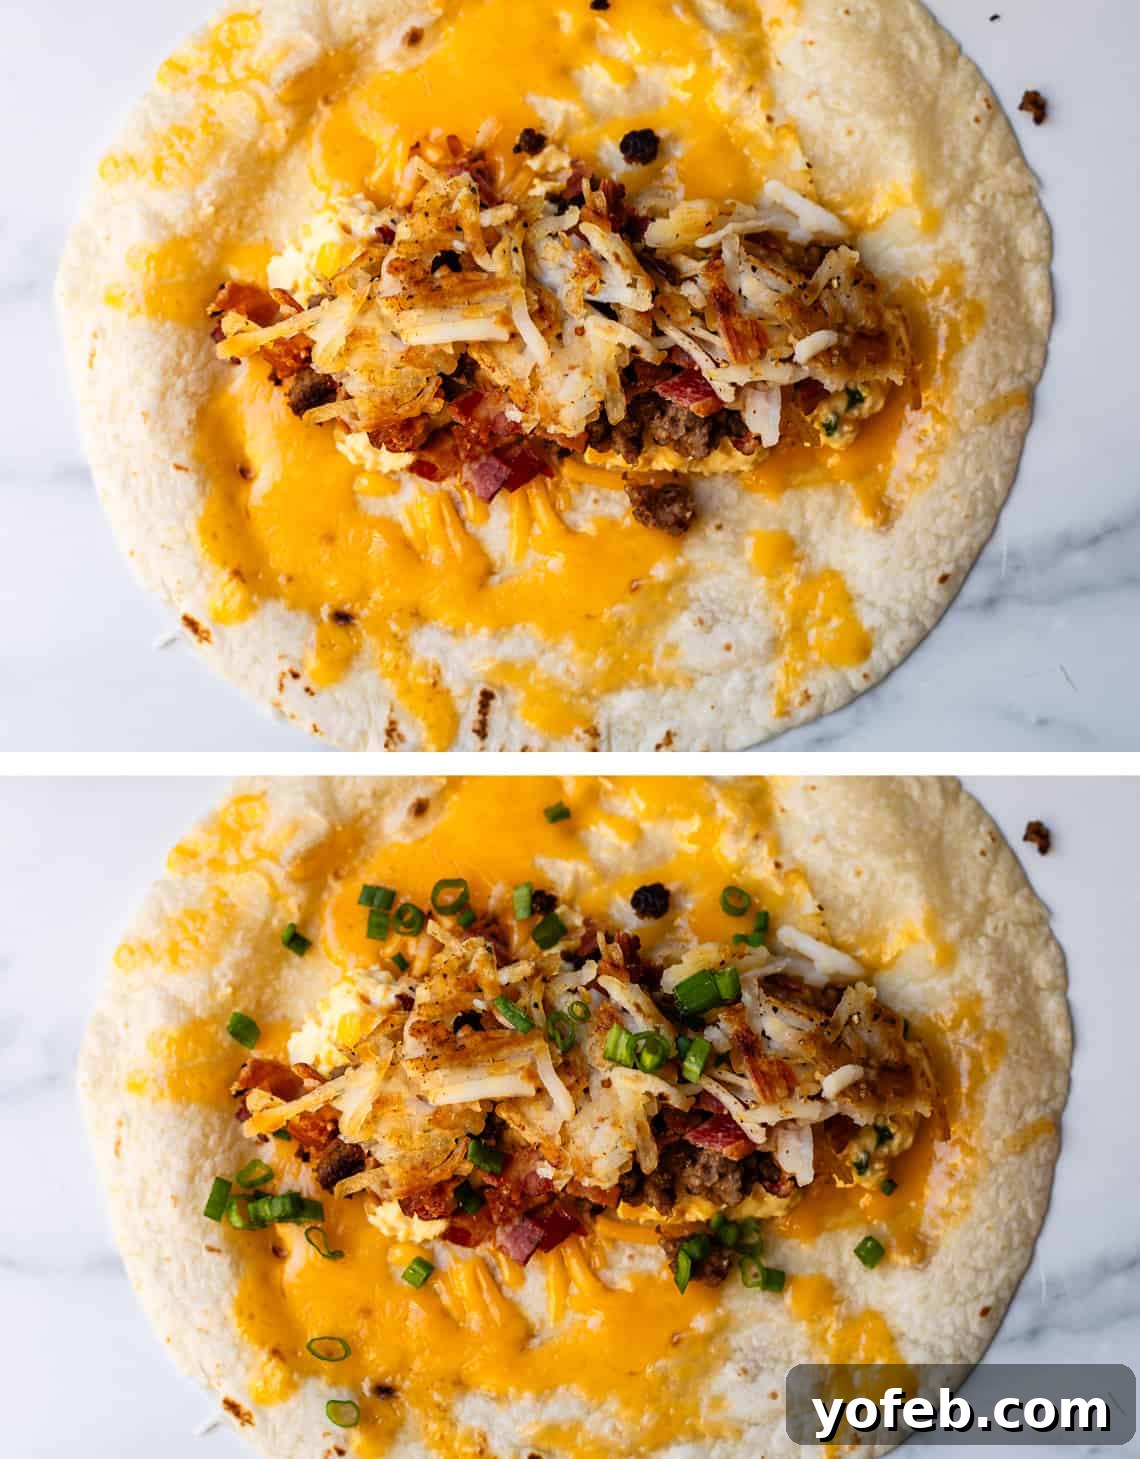
Before you begin layering, warm your tortillas. This makes them significantly more pliable and prevents cracking during folding. A fantastic tip for extra protection against soggy burritos is to melt a layer of cheese directly onto the warm tortilla. Simply sprinkle about 3-4 tablespoons of shredded cheese across the tortilla and microwave for 15-20 seconds until it’s just starting to melt. This creates an impermeable barrier between the tortilla and any wetter ingredients, ensuring a crisp exterior.
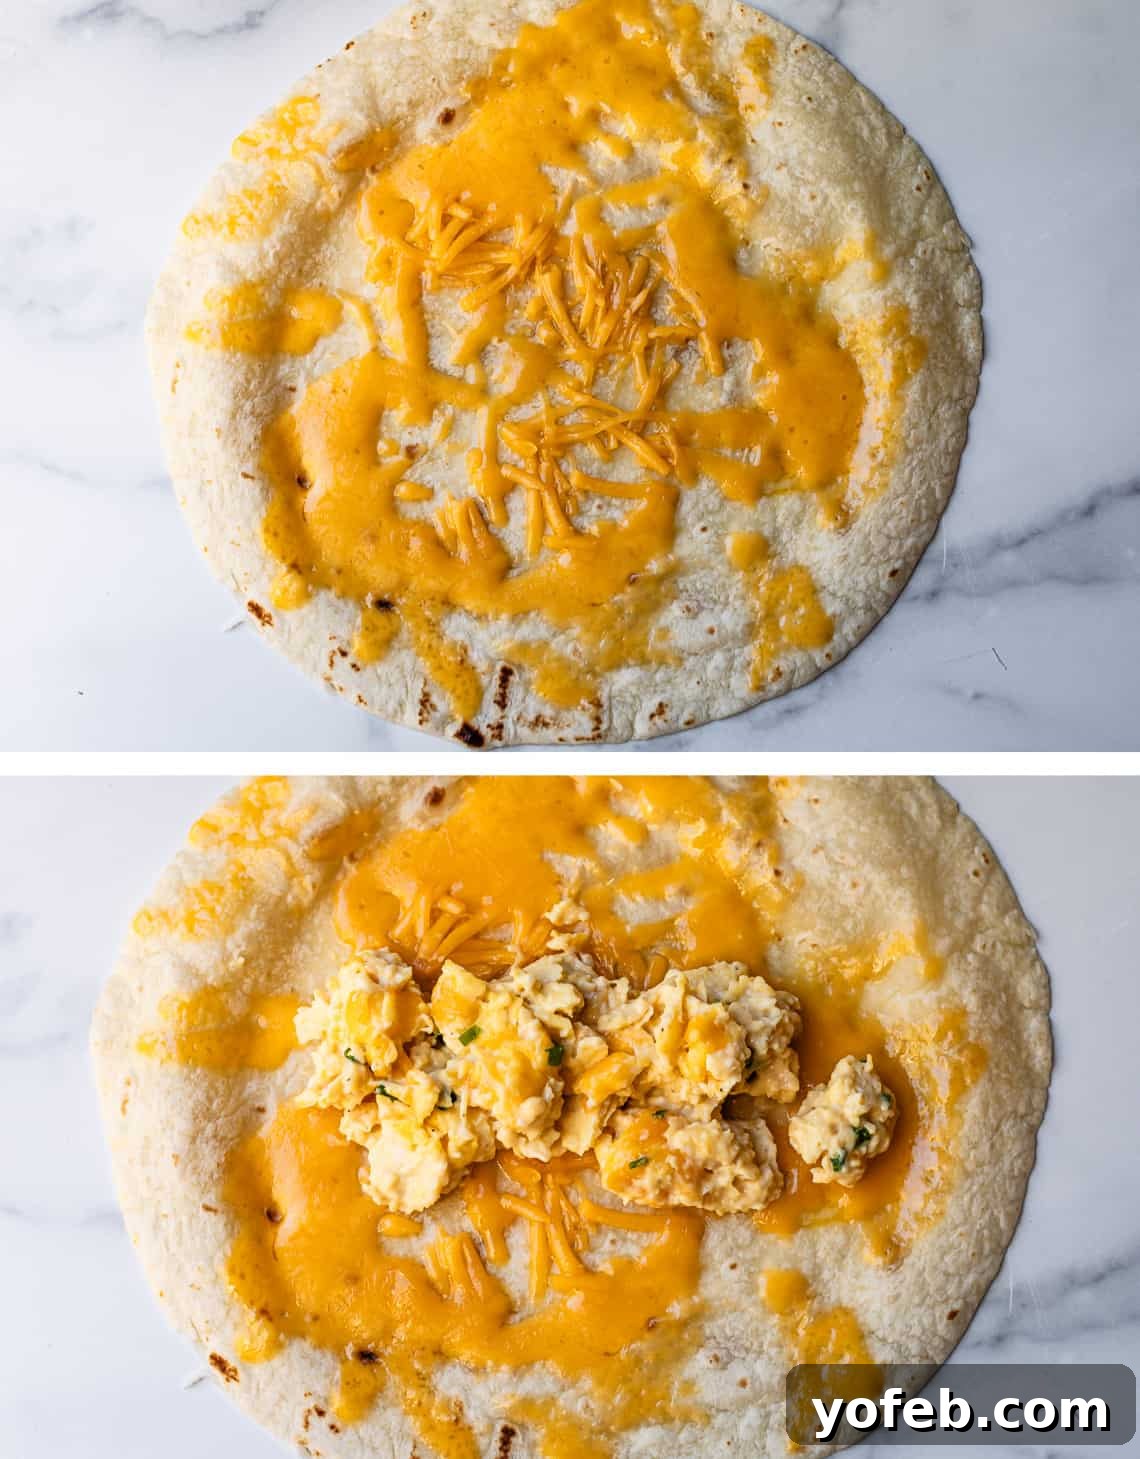
Once your cheese barrier is in place (or if you opt to skip melting the cheese), begin by layering your hash browns in a neat line down the center of the tortilla. On top of the hash browns, add a generous layer of your creamy scrambled eggs. Next, evenly distribute the cooked sausage and crispy bacon. Finally, if desired, sprinkle with chopped green onions for a fresh, mild onion flavor. Remember not to overstuff your burrito; a moderate amount of filling ensures easier, tighter folding and a better overall eating experience.
The Art of Folding a Burrito
Folding a burrito correctly is essential to keep all your delicious fillings securely tucked inside. It’s not difficult, but a good technique prevents messy spills. Here’s a step-by-step guide to achieving that perfect, tightly wrapped burrito:
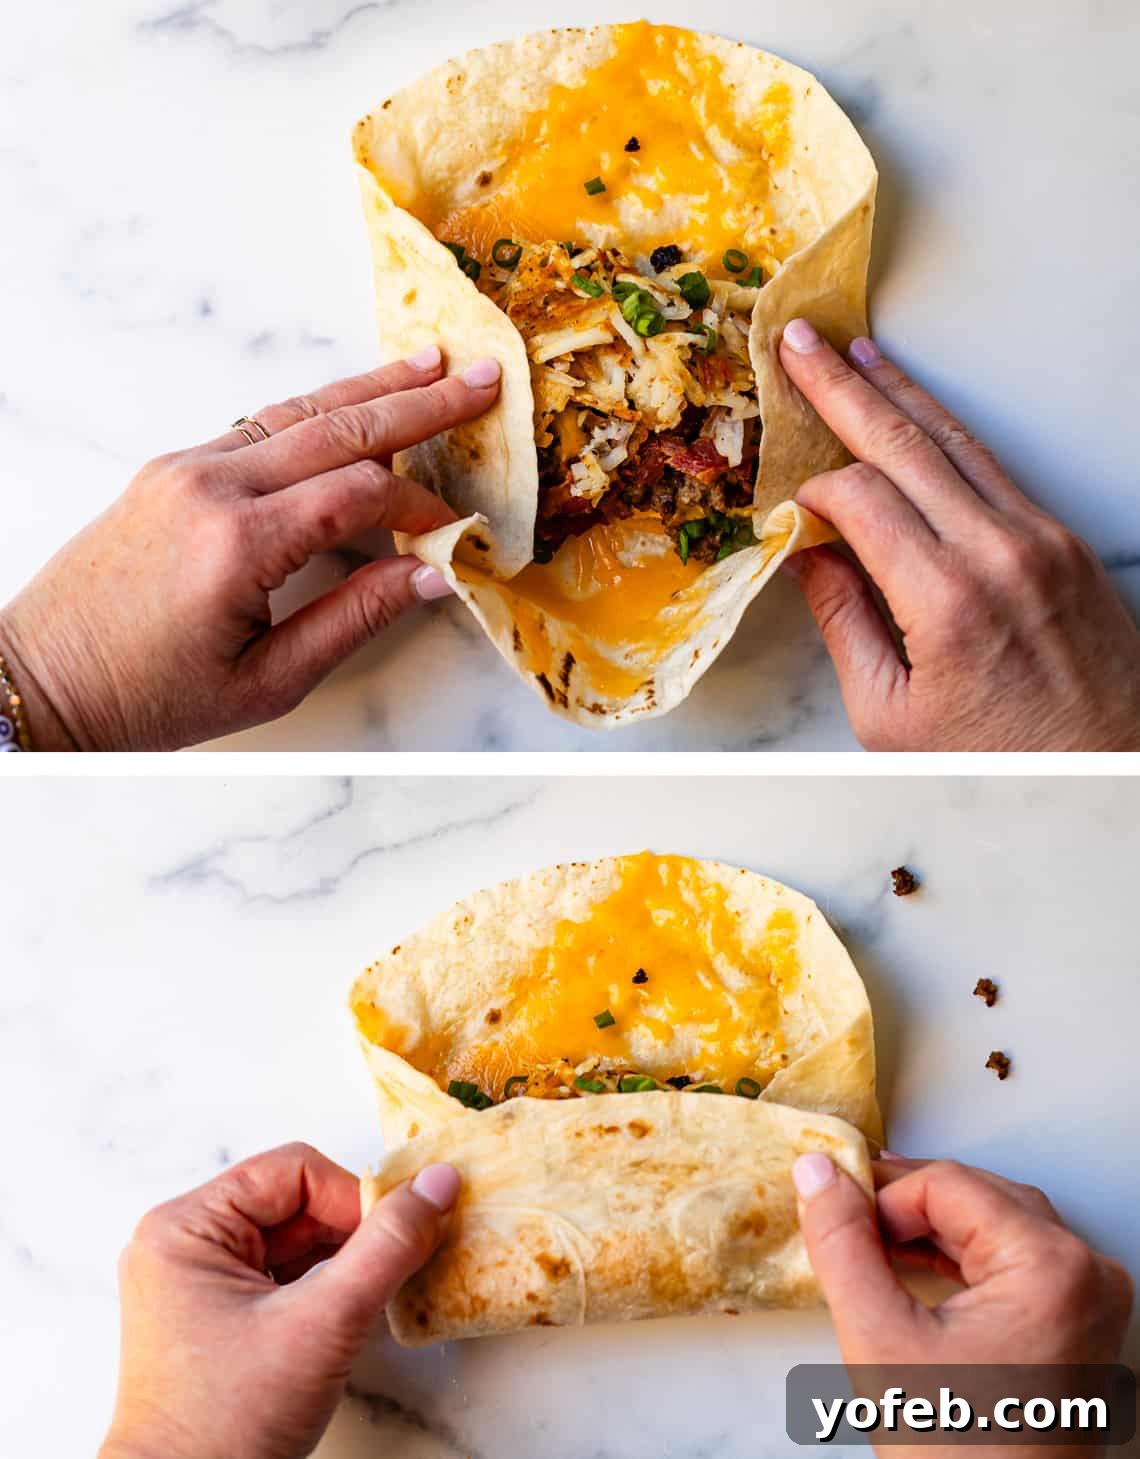
First, take the sides of the tortilla (the edges parallel to your filling line) and fold them inwards, slightly overlapping the filling. Then, take the bottom edge of the tortilla (the one closest to you) and fold it up tightly over the filling. As you do this, use your fingers to tuck the filling inwards, creating a compact cylinder.
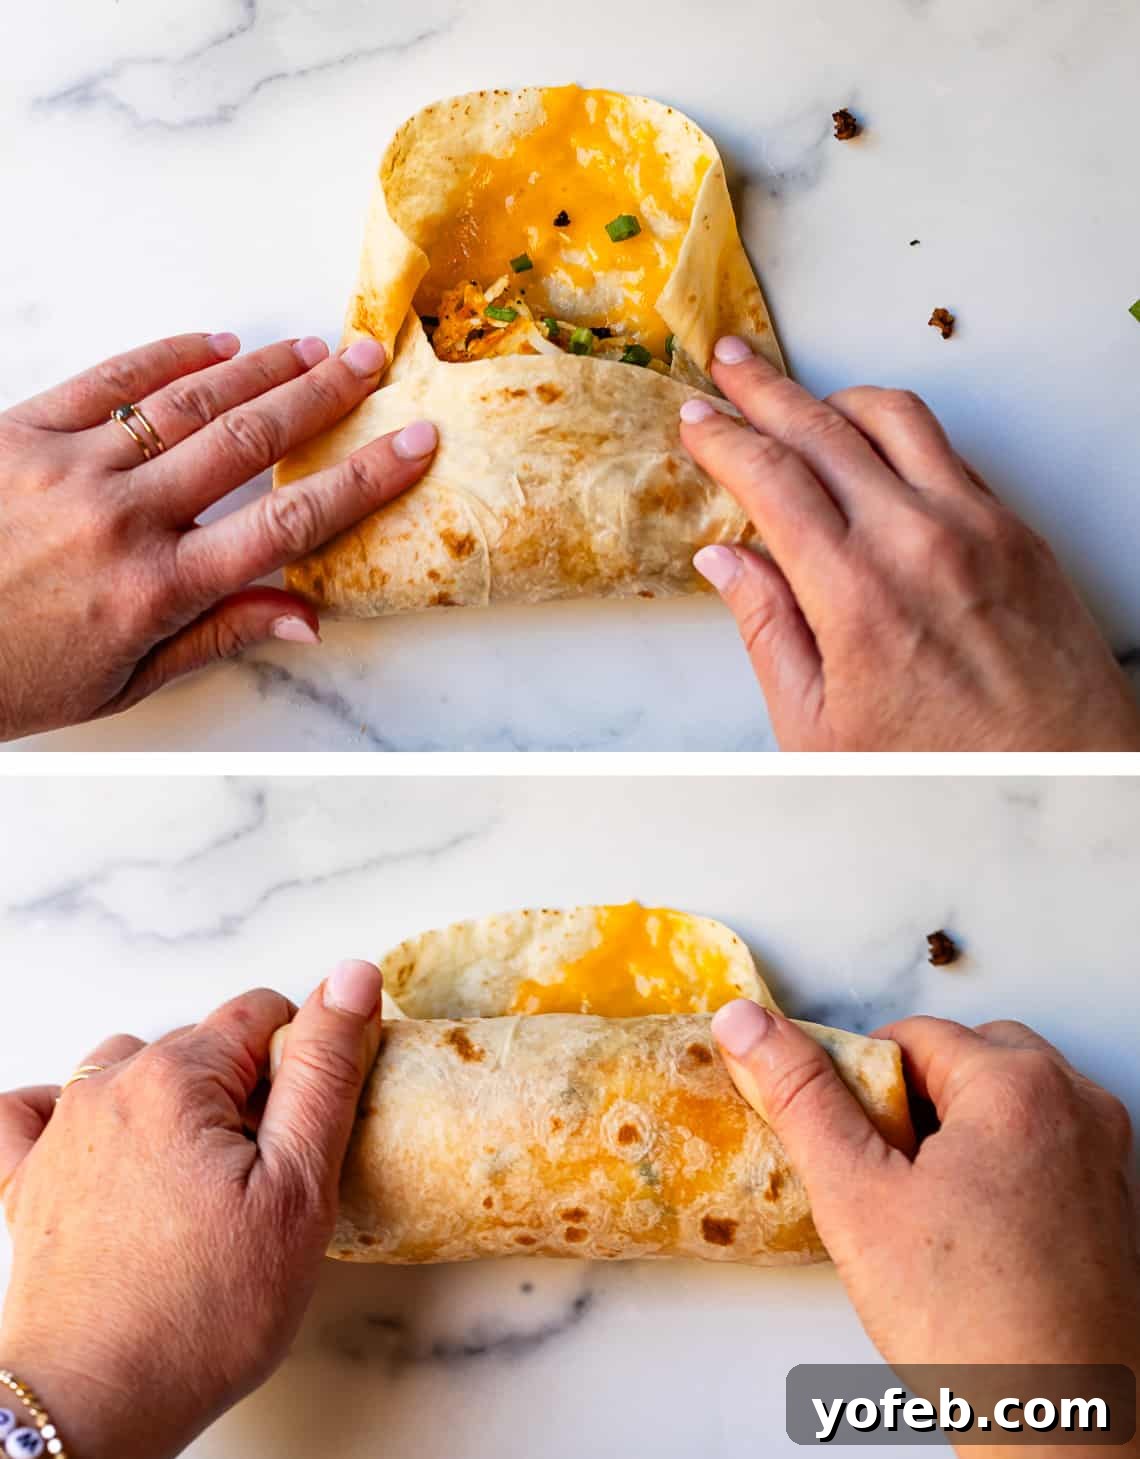
Next, perform one more small fold at the top edge of the burrito, similar to how you’d fold the flap of an envelope, to create a neat, tapered top. Now, simply roll the entire burrito upwards, away from you, keeping it as tight as possible. The goal is a firm, cylindrical shape with no exposed ends, ensuring all the contents are perfectly sealed within. If you’re planning to freeze your burritos immediately after assembly and they are still quite warm, it’s a good idea to flash freeze them on a pan for about 30 minutes. This prevents condensation from forming when you wrap them, which can lead to unwelcome sogginess. Never wrap hot burritos in foil!
How to Properly Wrap a Burrito in Foil
Properly wrapping your breakfast burritos is crucial for maintaining their freshness, preventing freezer burn, and ensuring they reheat beautifully. This is especially important for make-ahead meals.
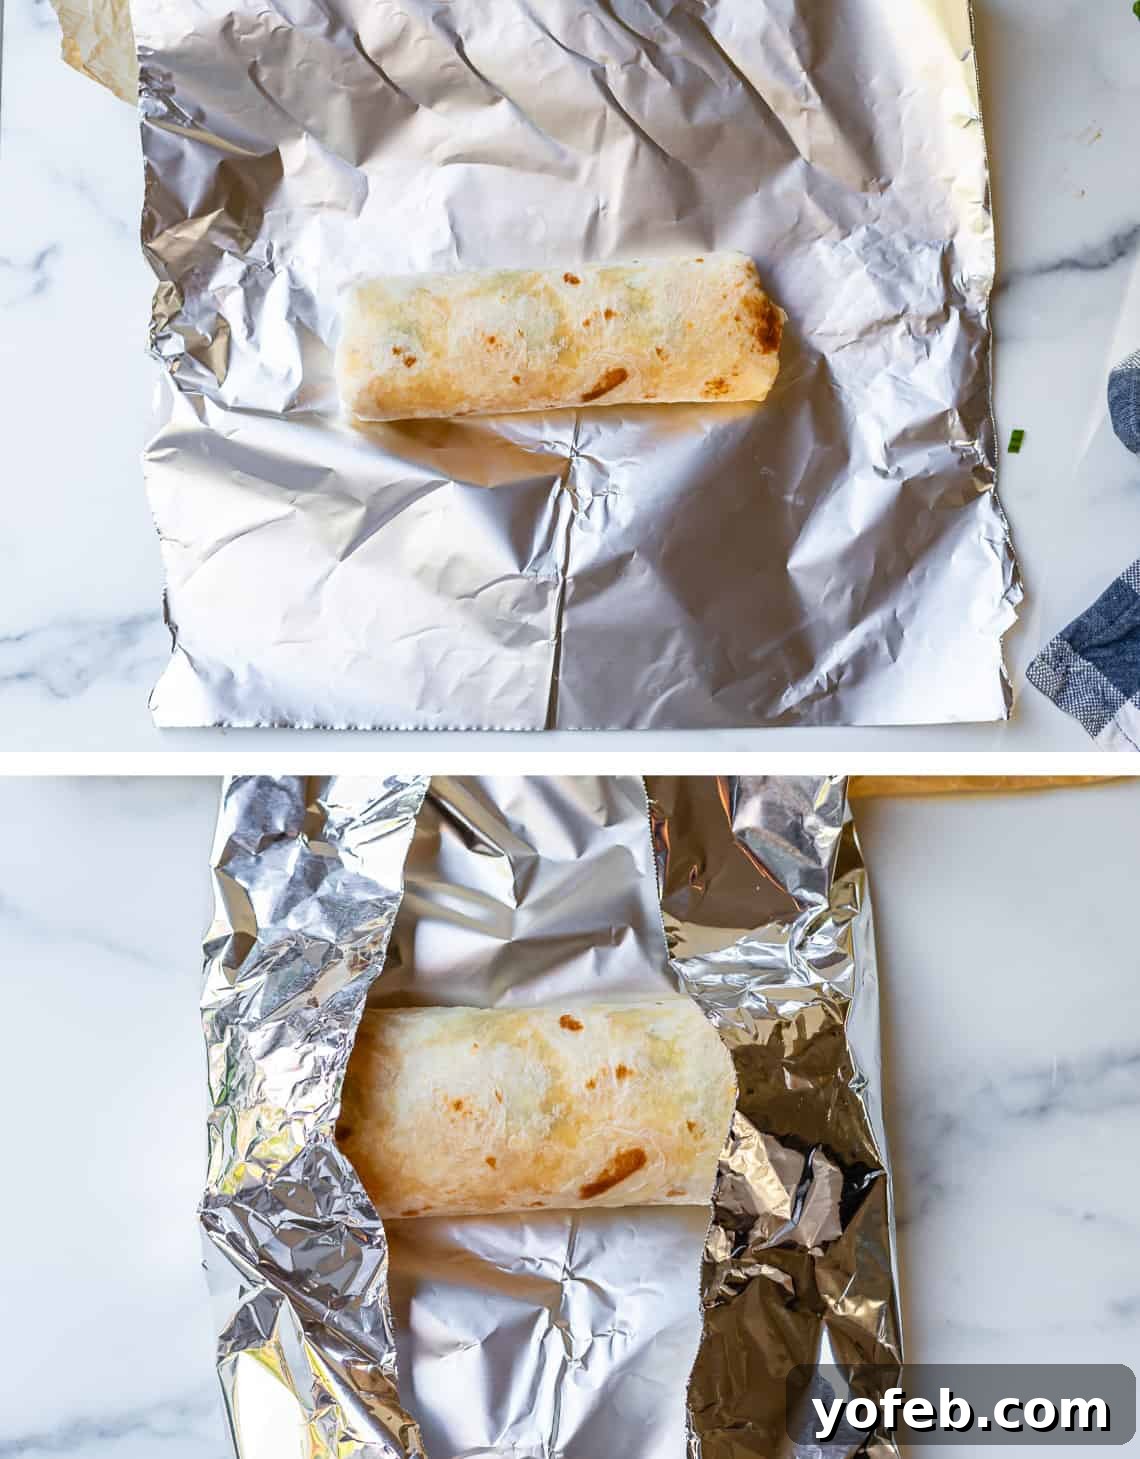
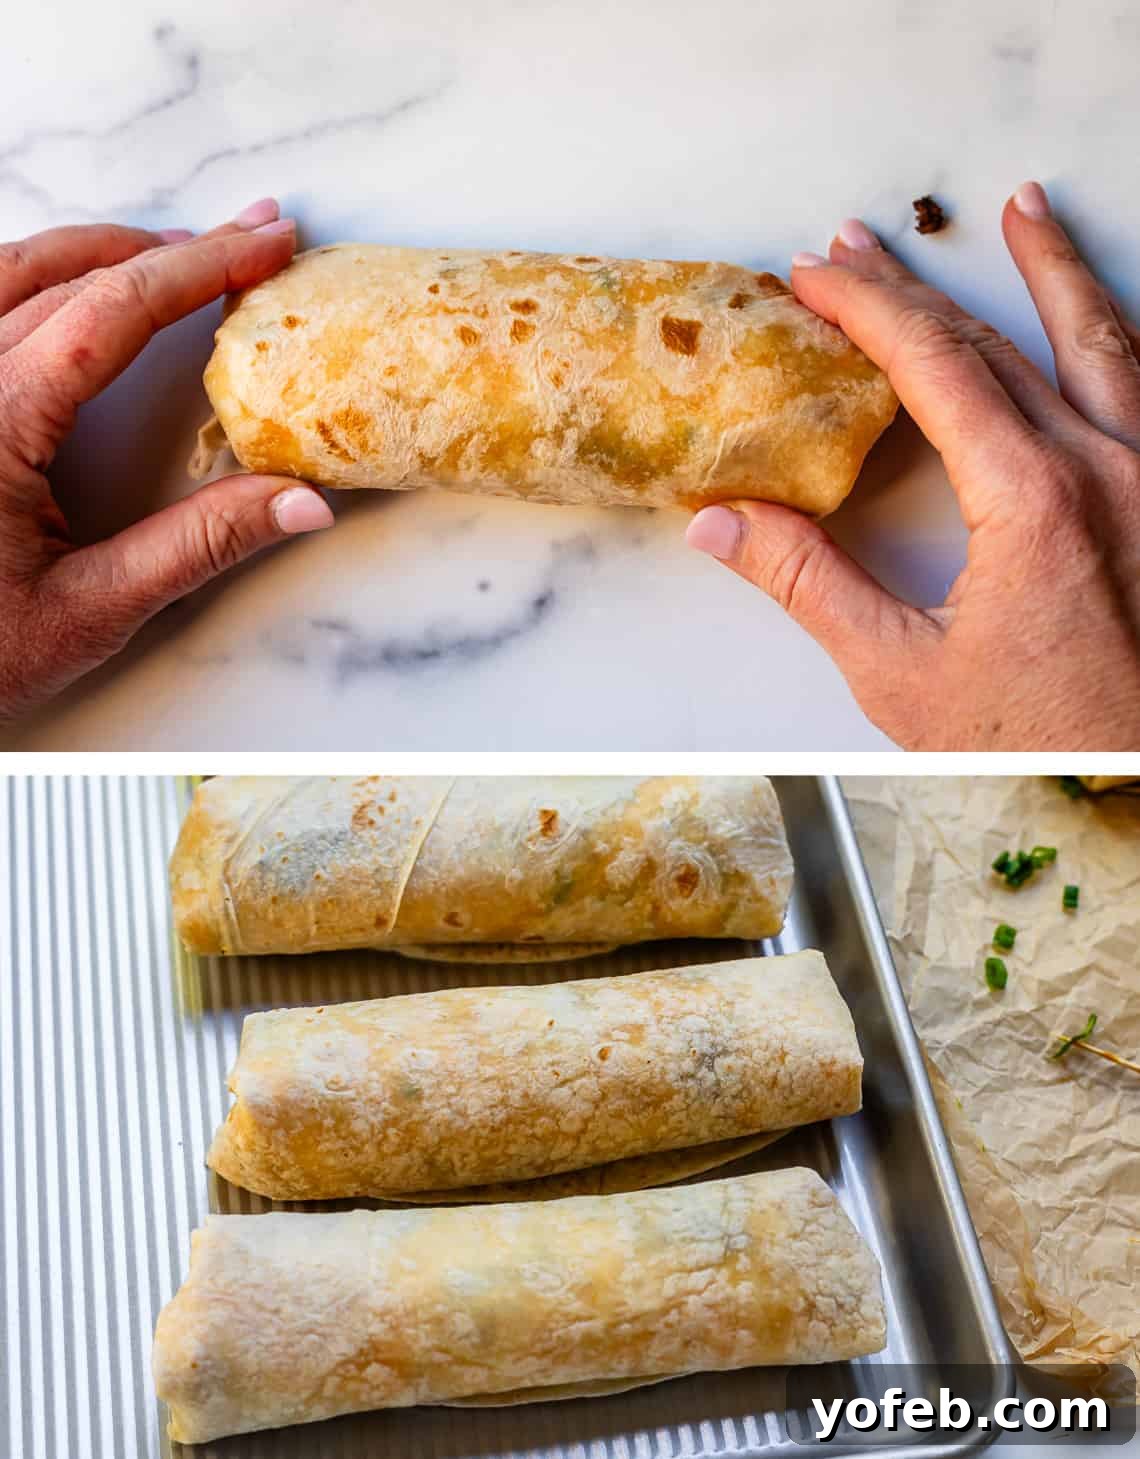
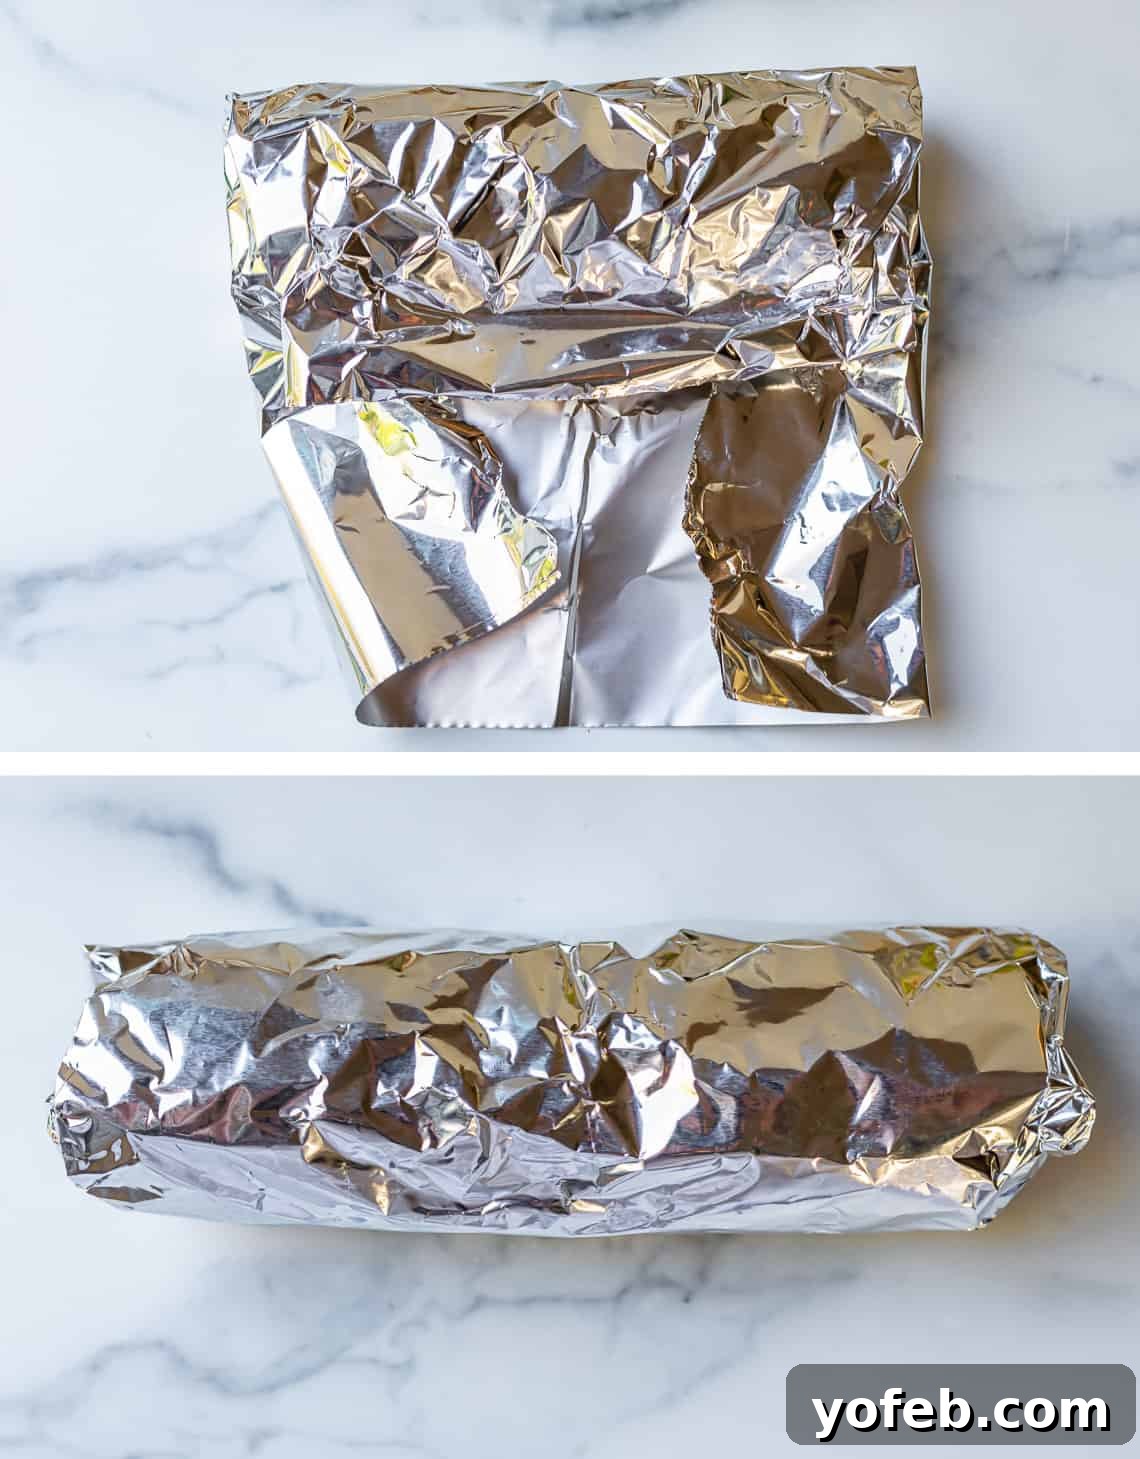
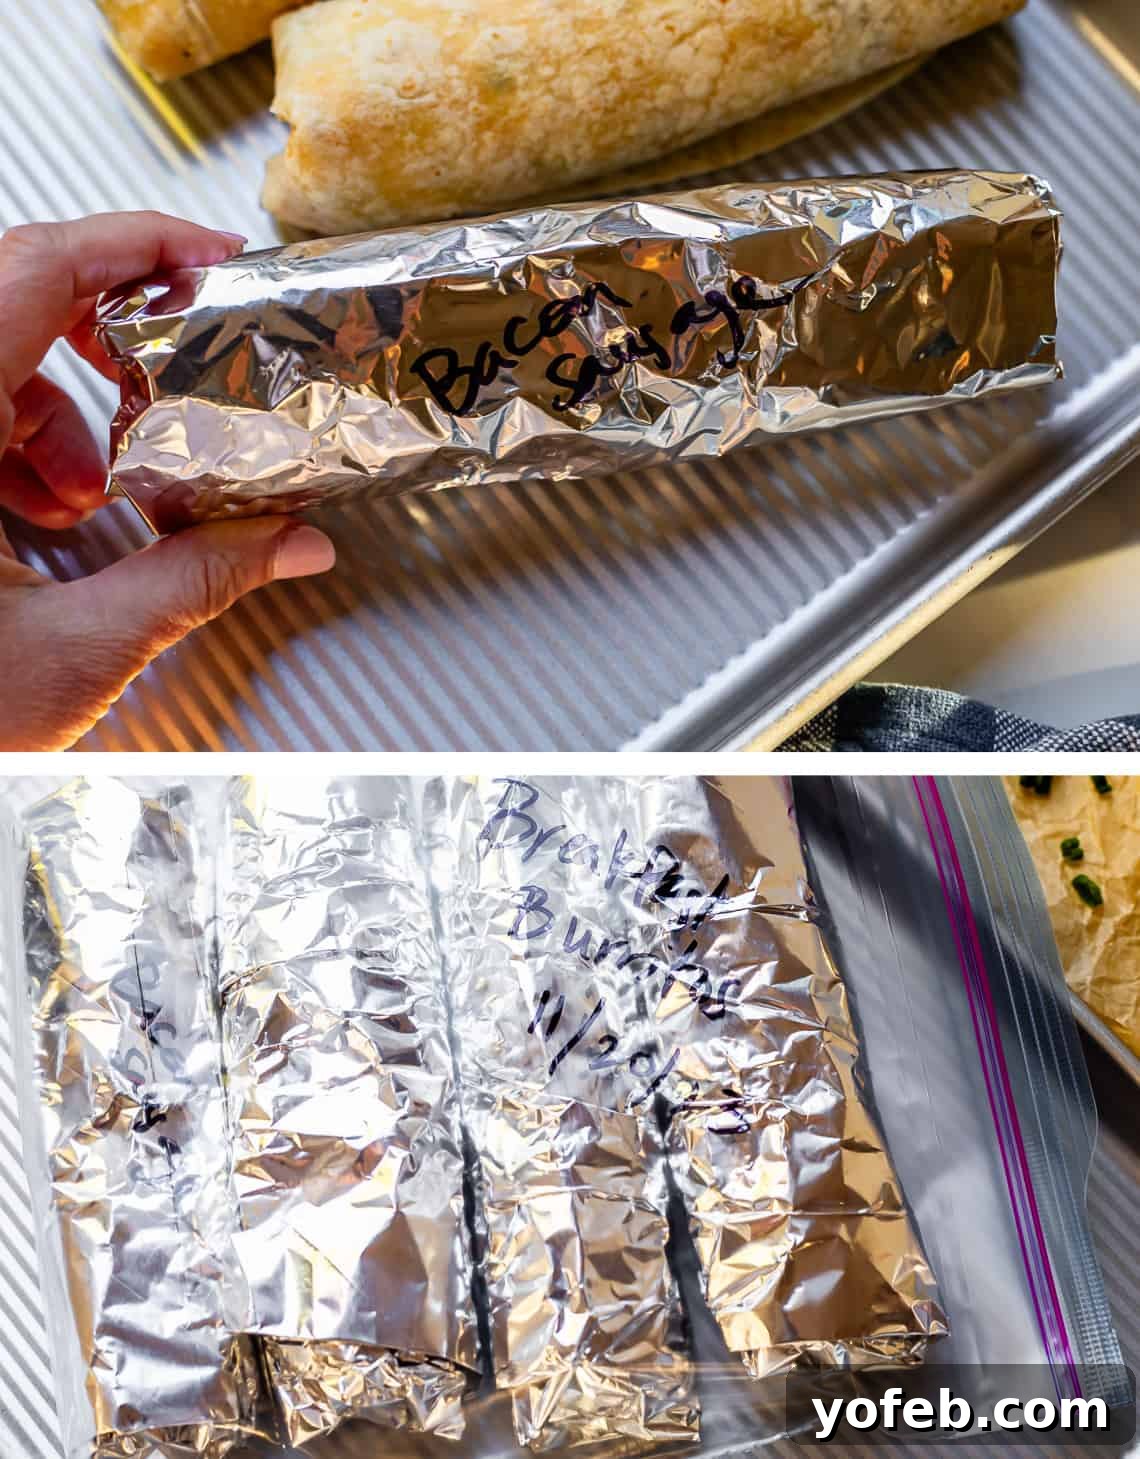
Start with a sheet of aluminum foil, roughly 12-14 inches square. Place your tightly rolled burrito near one edge of the foil, positioning it parallel to the edge. Fold the sides of the foil inward over the ends of the burrito, creating a sealed pocket. Then, tightly roll the burrito up in the foil from the bottom edge until it is completely encased. Ensure the foil is snug against the burrito to minimize air exposure. If you are preparing burritos with various fillings, use a permanent marker to label each foil-wrapped burrito. This will save you from a delicious mystery later!
Foil provides a good initial wrap, but it’s not perfectly airtight. For optimal freshness and to prevent freezer burn, always place your individually wrapped burritos into a larger freezer-safe ziplock bag or an airtight container. This double layer of protection is essential for long-term storage and ensures your burritos taste as fresh as the day you made them when you’re ready to enjoy them.
Creative Filling Ideas for Breakfast Burritos
The beauty of breakfast burritos lies in their incredible versatility. While our classic recipe is fantastic, don’t hesitate to experiment and make them your own! Here are numerous ways to customize your burritos and keep things exciting:
- Choose a Different Meat: Beyond bacon and sausage, the possibilities are vast. Try spicy chorizo for a kick, diced ham for a classic flavor, or thinly sliced steak for a heartier option. You can even incorporate flavorful leftovers like shredded brisket, pulled pork, or grilled chicken. Almost any cooked protein can find a delicious home in a breakfast burrito.
- Add Hearty Beans: For an extra boost of protein and fiber that will keep you full longer, consider adding beans. Black beans or pinto beans are excellent choices, but feel free to use any canned beans you have on hand. Refried beans would also provide a wonderfully creamy texture. Just remember to drain and rinse canned beans, if needed, before adding them to your assembly line.
- Go Vegetarian or Vegan: Easily transform these burritos into a meat-free delight. Omit the meat and double up on beans, or sauté some finely grated tofu or plant-based sausage alternatives like Soyrizo for a flavorful substitute. Incorporating plenty of vegetables can also make them incredibly satisfying.
- Switch Up Your Cheese Flavor: While cheddar is a dependable classic, don’t limit yourself! Pepper jack will add a spicy warmth, while Monterey Jack, Swiss, or Gruyere can introduce unique savory notes. For a tangy twist, consider queso fresco or crumbled feta; note that these maintain a more crumbly texture rather than melting smoothly, but they add fantastic flavor. You could even combine them with a melty cheese like cheddar for the best of both worlds. Get cheesy and creative!
- Load Up on Veggies: Burritos are an excellent vehicle for “sneaking in” more vegetables. The key is to ensure they are cooked until tender and, most importantly, completely free of excess liquid to prevent a soggy burrito. Start simply with sautéed onions and garlic in your reserved bacon grease, or create a colorful medley with jalapeños, green chilies, diced tomatoes, mushrooms, chopped spinach, zucchini, or corn. You can mix sautéed vegetables with your meat or add them as a separate layer. Just be aware that vegetables can increase the moisture content, so ensure they are very well-drained and cooled before assembly, especially if freezing.
- Boost the Protein Content: If you’re looking for an even more protein-packed breakfast, you have a few options. You can replace some of the whole eggs with liquid egg whites, using about 3 tablespoons per egg you substitute (I don’t recommend replacing more than half the eggs). Alternatively, when scrambling your eggs, blend in about ½ cup of cottage cheese (blended until smooth for a subtle texture, or normal for a slightly chunky addition).
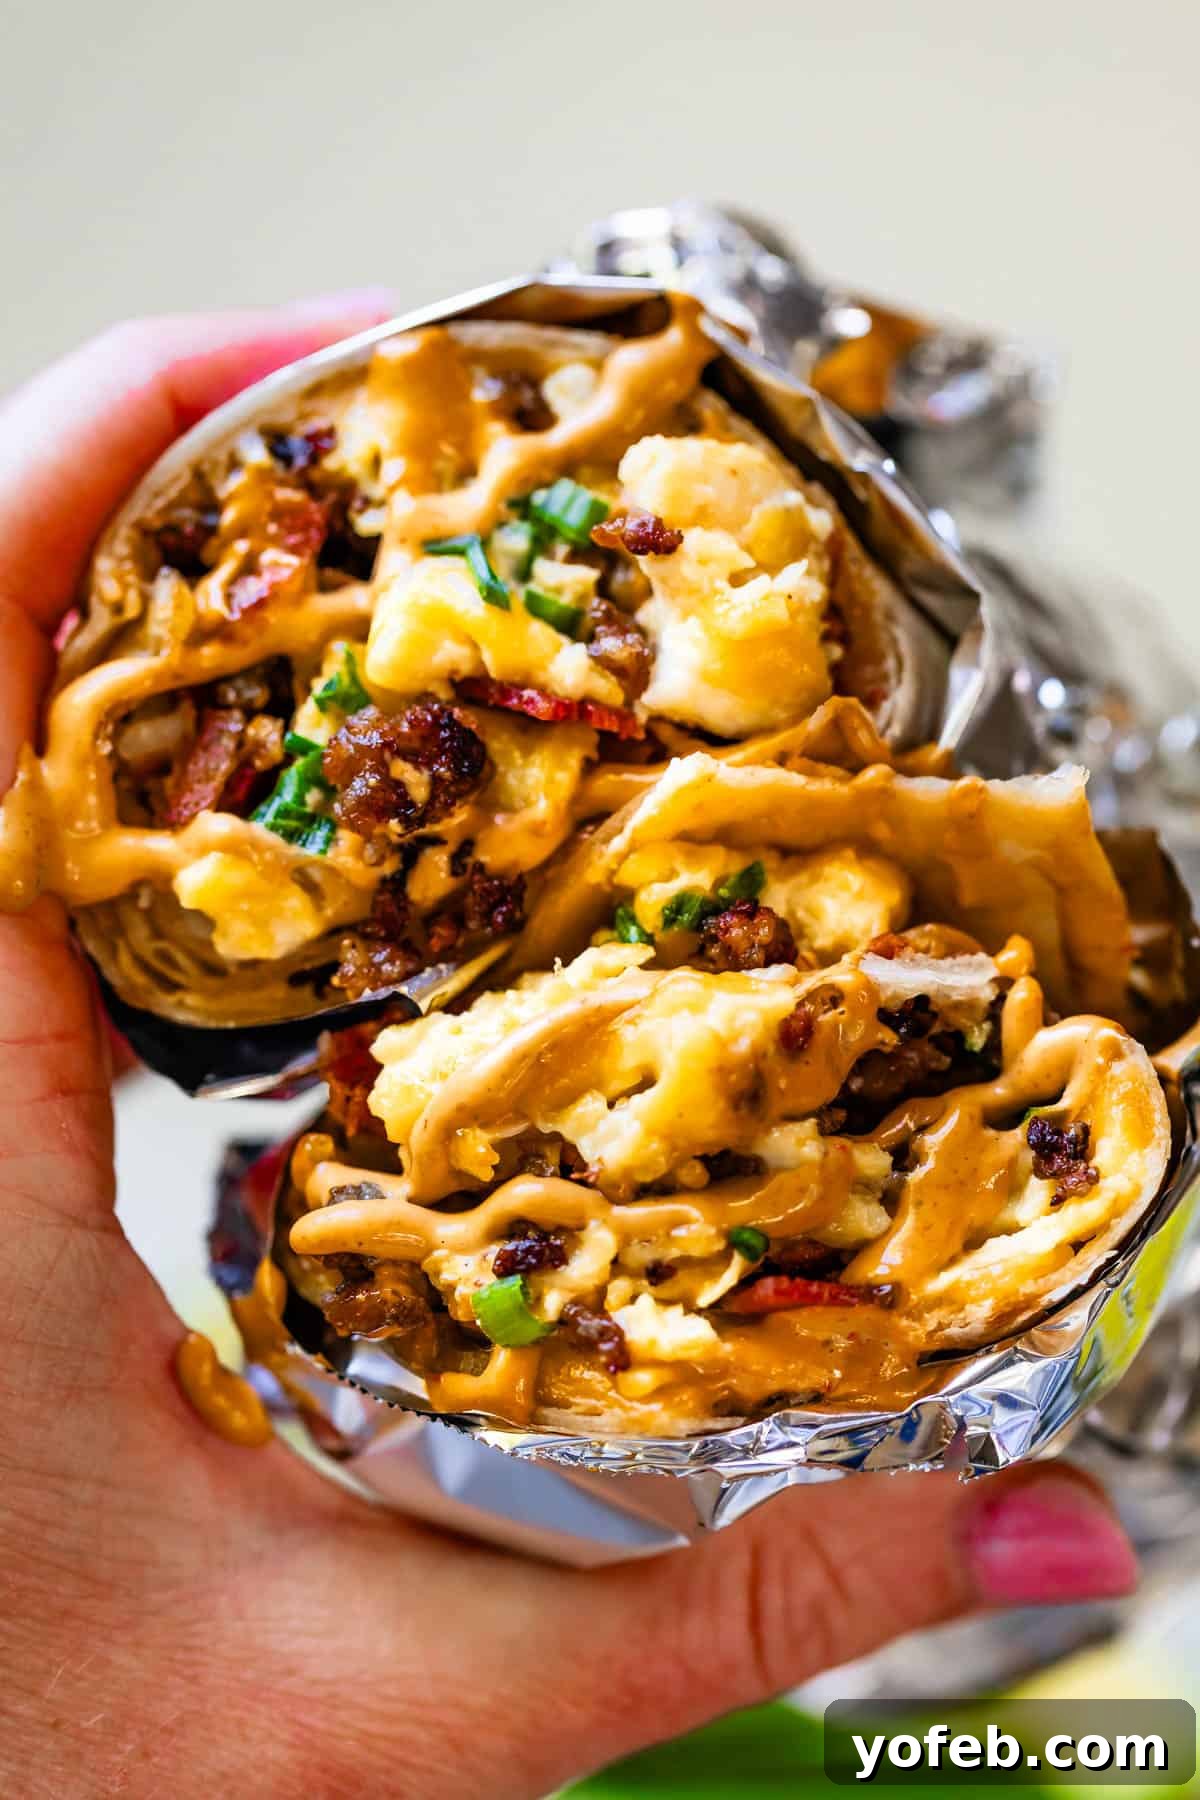
Irresistible Burrito Combo Suggestions
While the filling options are truly endless, sometimes a little inspiration helps! Here are some fantastic flavor combinations that are high on my personal list to try next. These demonstrate just how versatile and adaptable breakfast burritos can be for any palate or craving:
Spicy Chorizo Dream
- Cooked pork chorizo, creamy scrambled eggs, sharp cheddar cheese, crispy hash browns, a dash of hot sauce, and a drizzle of creamy pasilla crema (or a vibrant chipotle mayo).
Smoky Gouda & Bacon Bliss
- Crispy bacon, rich Gouda cheese, tender eggs, finely diced jalapeños for a touch of heat, fresh chives, golden hash browns, and a dollop of mascarpone for an unexpected creamy element. (I’m eager to experiment with mascarpone; I believe spreading it directly on the tortilla could offer a unique, creamy barrier that freezes and reheats exceptionally well, potentially outperforming mayo-based sauces for freezer burritos.)
Sweet Caramelized Onion Fiesta
- Soft scrambled eggs, crunchy hash browns, savory bacon, deeply flavored caramelized onions, and a generous amount of zesty pepper jack cheese for a delightful blend of sweet and spicy.
Vibrant Veggie Delight
- Sautéed spinach, mushrooms, and onions (cooked until all liquid has evaporated and seasoned to perfection), fluffy eggs, crispy hash browns, and your choice of sharp cheddar or nutty Gouda cheese. This combination is bursting with garden-fresh flavor.
Hearty Sausage & Aioli Kick
- Tender scrambled eggs, robust breakfast sausage, classic cheddar cheese, a generous swirl of spicy aioli, and perfectly crispy tater tots (a great alternative to shredded hash browns!).
Savory Leftovers Reinvented
- Shredded leftover pork or beef, soft scrambled eggs, crispy hash browns, a spoonful of zesty salsa, and colorful sautéed bell peppers. This is a fantastic way to transform yesterday’s dinner into a whole new breakfast experience!
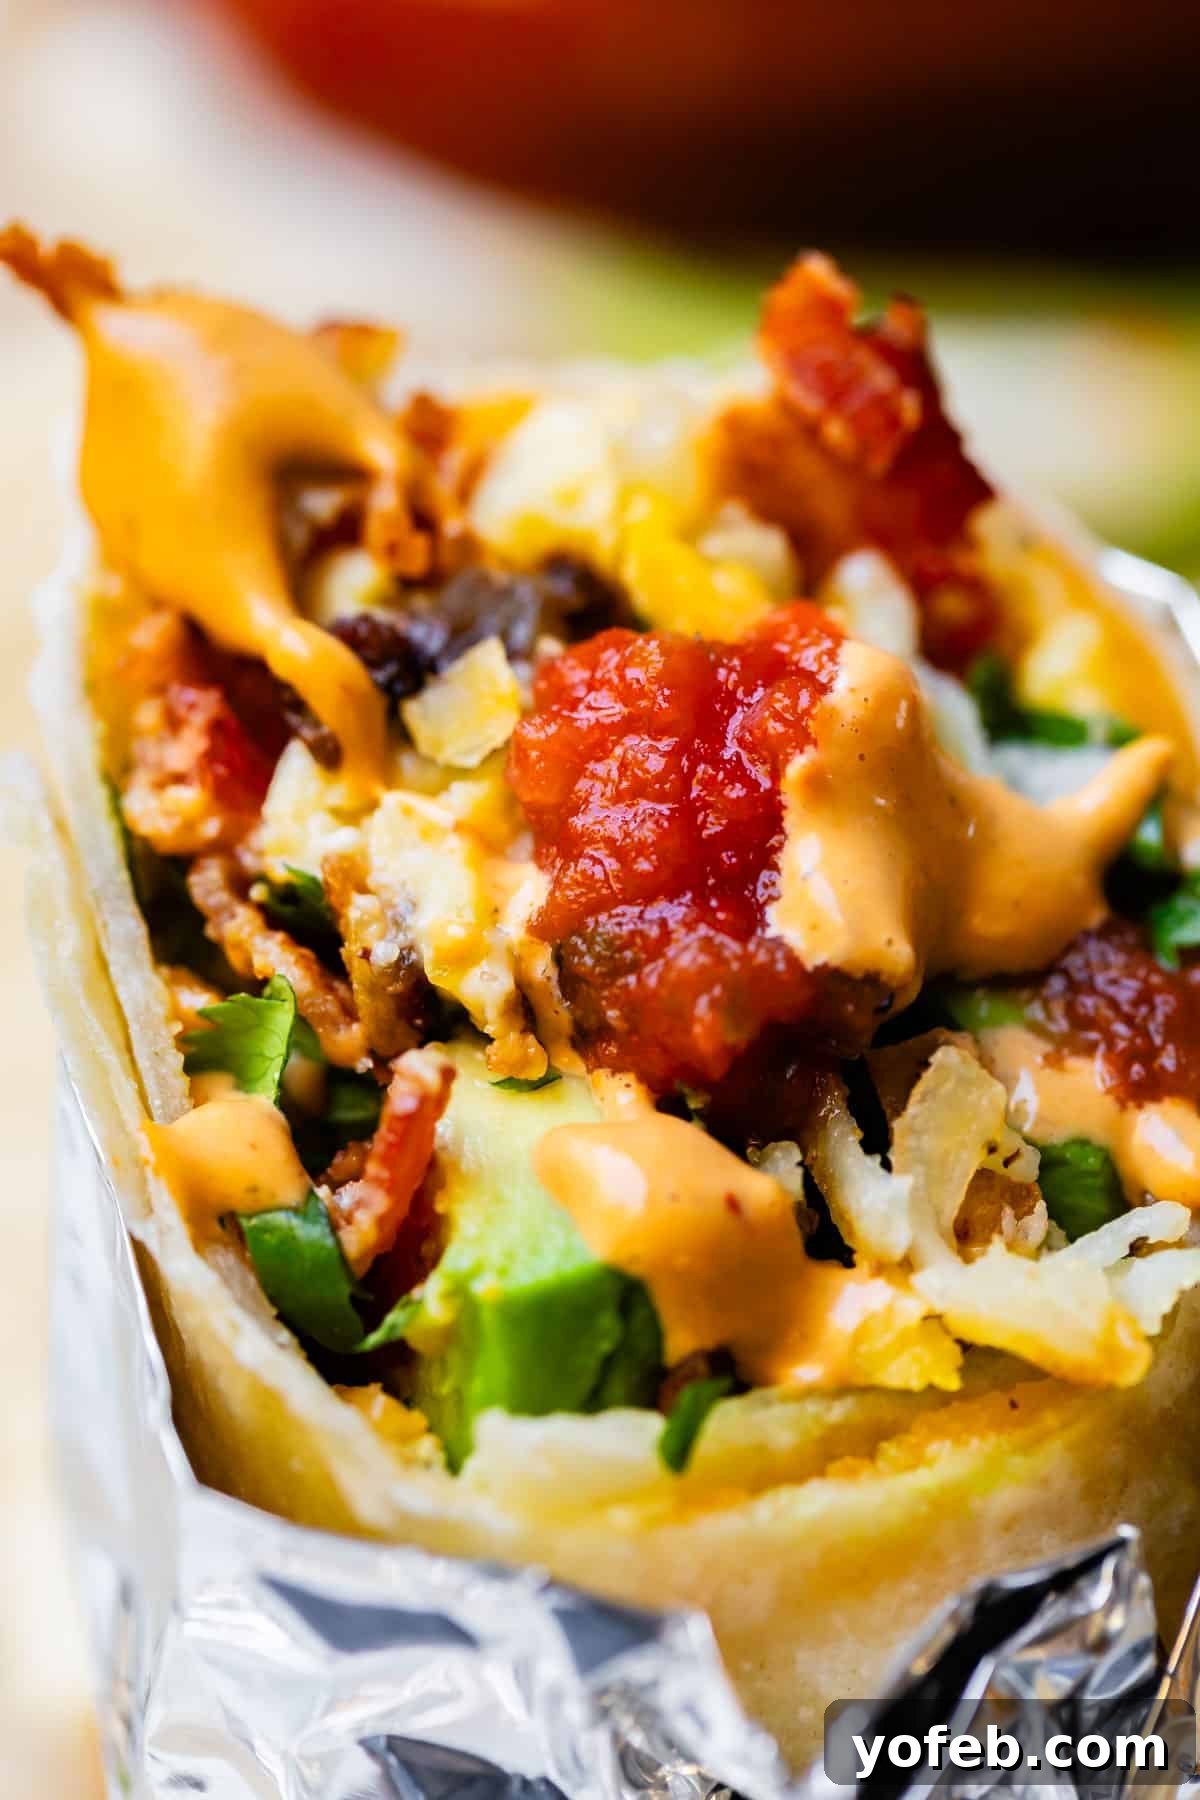
What to Serve With Your Breakfast Burritos
Breakfast burritos are a fantastic foundation for an incredible morning meal! You can keep it minimalist with a simple side of salsa, or go all out and create a lavish brunch spread with multiple accompaniments. However you choose to serve them, these burritos are guaranteed to be a hit – few can resist their appeal!
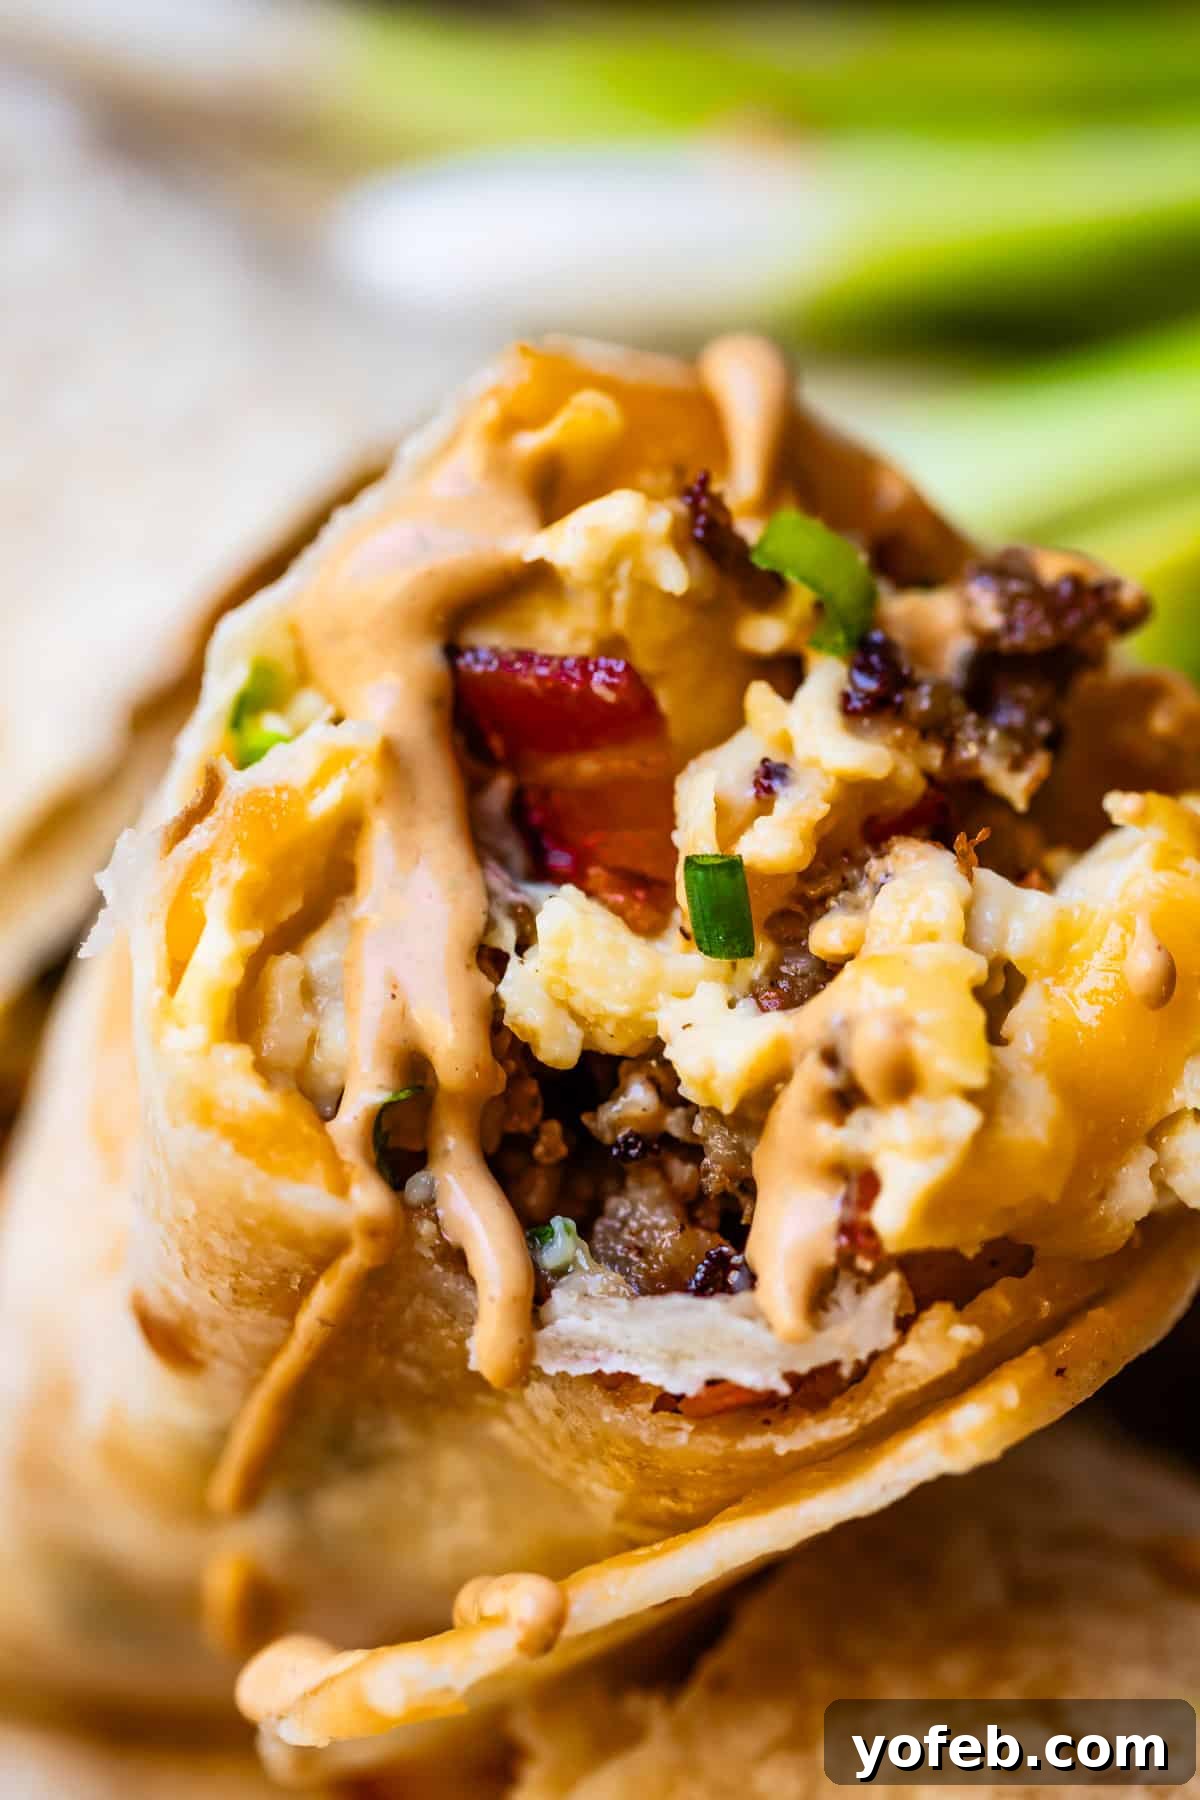
- Essential Condiments! Elevate your homemade breakfast burritos with an array of delicious sauces. My personal favorite is creamy Chipotle Mayo, offering a smoky, spicy kick. Other excellent choices include vibrant 5-Minute Restaurant Style Salsa, a zesty Sriracha Mayonnaise for extra heat, a refreshing Creamy Tomatillo Cilantro Ranch, or a versatile Creamy Salsa Dressing. And, of course, no Mexican-inspired meal is complete without fresh Guacamole or a dollop of classic sour cream for dipping or topping.
- Fresh Fruit! For a quick and easy breakfast, simply pair your burrito with a banana, clementine, or apple. If you’re hosting a family breakfast or brunch, consider preparing a colorful fruit platter featuring all your favorite seasonal berries, melons, and citrus.
- Yogurt or Smoothies: For a lighter, refreshing accompaniment, a bowl of Greek yogurt or a fruit and veggie smoothie provides a healthy balance to your savory burrito.
If you prefer your vegetables outside the burrito, they make excellent side dishes. Try a quick 10-minute Sautéed Zucchini and Squash, or a simple stir-fry of your favorite seasonal greens to add fresh nutrients to your meal.
How to Store Breakfast Burritos for Freshness
Proper storage is key to enjoying your delicious breakfast burritos for days or even months to come. In my experience, freezing leftover burritos is by far the best method. Freezing helps to lock in the flavors and textures of the ingredients, keeping them mostly intact until you’re ready to reheat. In contrast, storing burritos in the refrigerator for too long allows the fillings to naturally release moisture, which inevitably leads to a sad, soggy tortilla. For detailed freezing instructions, please see the section below.
If you do opt to store burritos in the refrigerator for short-term use, ensure they are individually wrapped extremely well in plastic wrap. This barrier helps to prevent flavors from transferring in or out and keeps moisture at bay. After wrapping, place them in a large, airtight container or a heavy-duty ziplock bag. While the ingredients will technically be safe for 3-4 days, I highly recommend consuming them within 1-2 days for the best possible taste and texture, before any sogginess can set in.
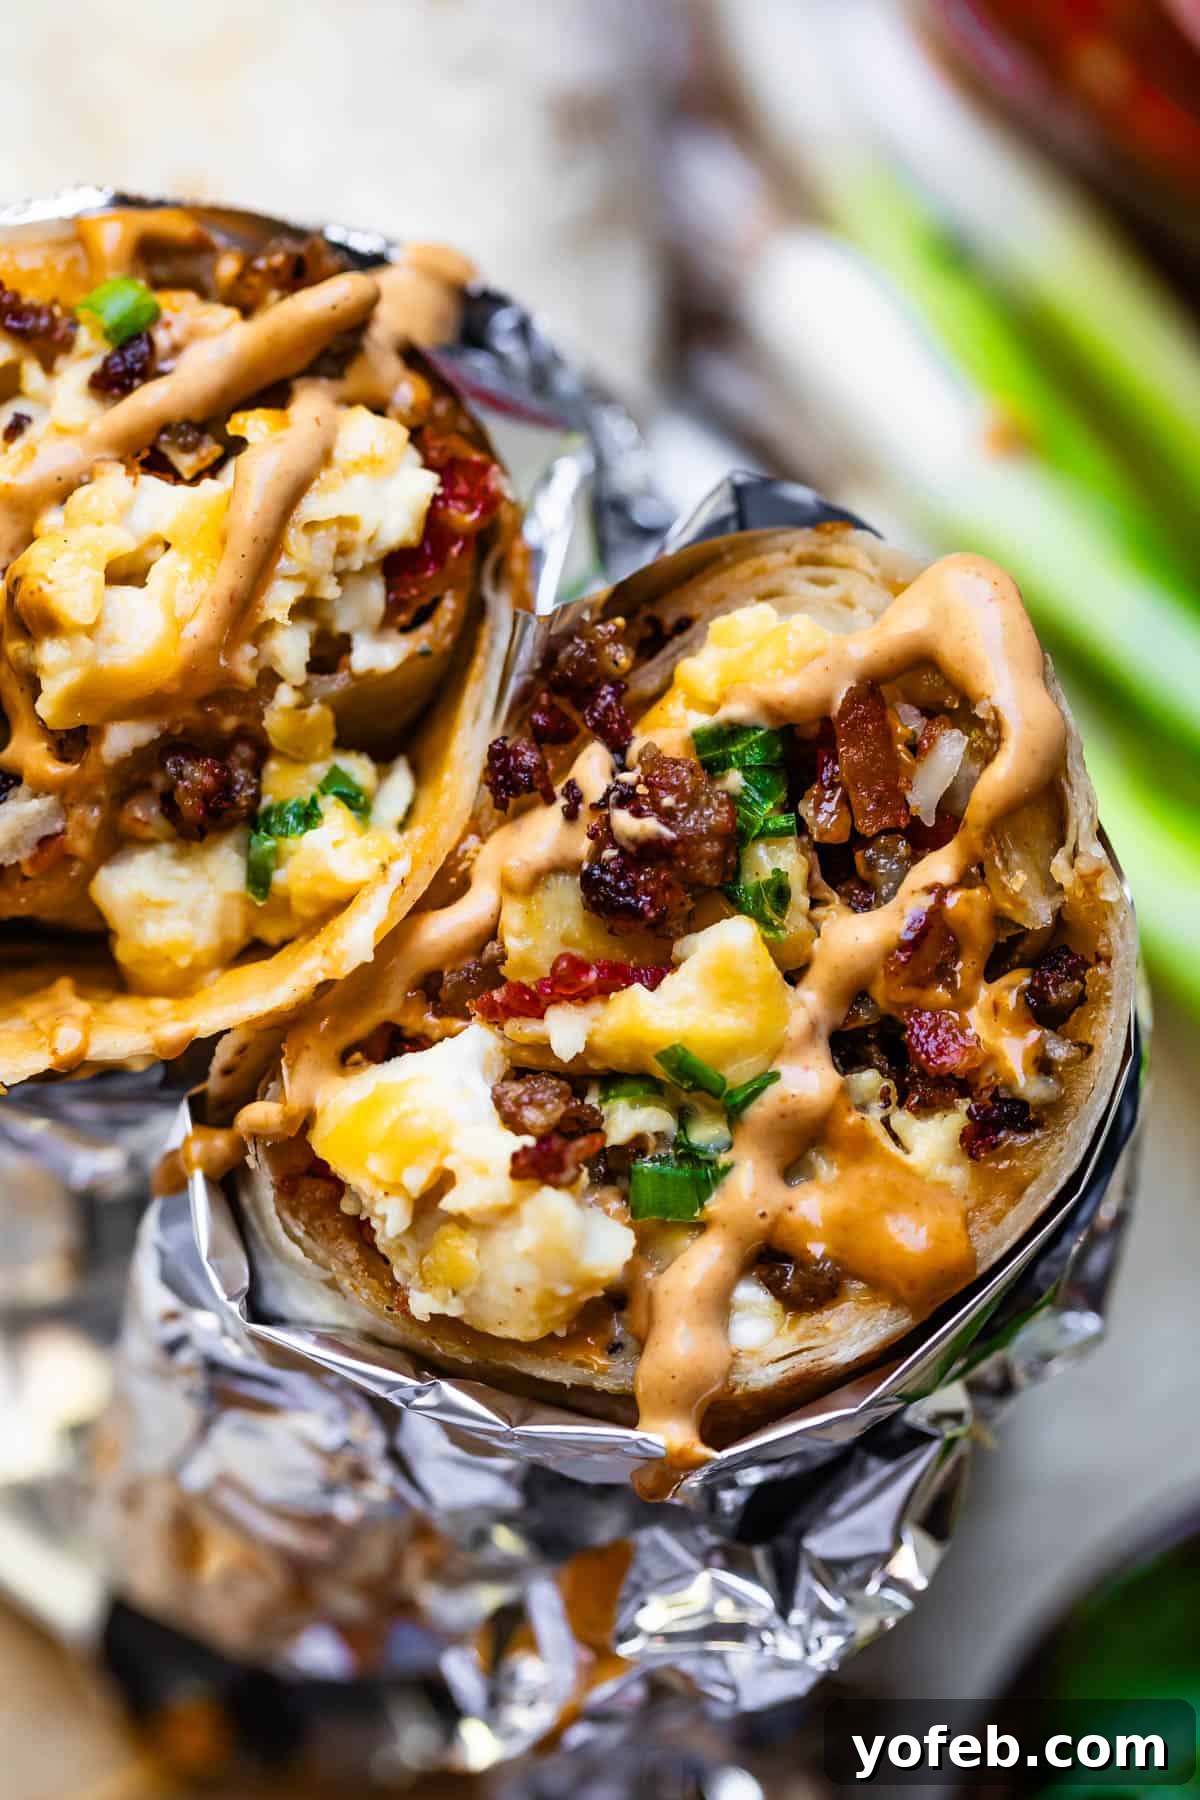
Your Guide to Freezer Breakfast Burritos
Freezer breakfast burritos are a highly popular make-ahead meal for a reason: they offer a simple, homemade breakfast ready in just minutes, tasting as delicious as the day they were made! Here’s how to freeze and reheat them for optimal results:
Preparing for the Freezer:
- Cool Completely: Ensure your assembled burritos are completely cool before wrapping. This is a critical step! Wrapping warm burritos traps steam and moisture, which will inevitably lead to a soggy tortilla upon thawing or reheating.
- Individual Wrapping: Wrap each cooled burrito tightly in plastic wrap first, followed by a layer of aluminum foil. This double-layer protection is essential for preventing freezer burn and maintaining freshness.
- Flash Freeze: Arrange the foil-wrapped burritos in a single layer on a cookie sheet pan. Flash freeze them for 30-60 minutes. This initial freezing prevents them from sticking together and helps them retain their shape.
- Airtight Storage: Once flash-frozen, transfer the burritos to a large ziplock freezer bag. This extra step helps to create an even more airtight seal, preventing freezer burn and keeping the burritos fresher than if they were stored loosely in the freezer. Properly stored, they will remain delicious for about 2-3 months.
Reheating from Frozen:
There are two primary methods for reheating your frozen breakfast burritos:
Microwave Method (Quickest):
- Remove a frozen burrito from the freezer.
- Unwrap it completely, discarding all plastic wrap and foil.
- Wrap the burrito in a damp paper towel.
- Place it on a microwave-safe plate.
- Defrost Setting: Use your microwave’s defrost button for 4-5 minutes.
- Regular Setting (if no defrost): If your microwave doesn’t have a defrost setting, cook it on power level 5 (or 50% power) for 3-5 minutes. Cooking at a lower power level is crucial; it allows the inside to thaw and warm up evenly without overcooking and hardening the exterior before the center is ready.
- Check and Continue: After the initial 2-3 minutes, check the burrito’s temperature. You might want to carefully slice it in half and wrap each half in a damp paper towel to allow heat to penetrate more effectively. Continue microwaving in 30-second increments until the burrito is hot to the touch in the middle, top, and bottom.
- Trial and Error: Microwave times vary significantly based on your appliance’s wattage and the density of your burrito fillings. It may take a few tries to determine the perfect cook time for your specific microwave and burritos.
- Avoid Overheating: Be cautious not to overcook the burrito, as overheated eggs (and any vegetables you included) can release moisture, making your burrito soggy or rubbery.
Oven Method (For Multiple Burritos or Crispier Finish):
- Preheat your oven to 350 degrees F (175 degrees C).
- Keep the burritos wrapped in their aluminum foil (remove plastic wrap first).
- Place the completely frozen, foil-wrapped burritos on a baking sheet.
- Bake for about 45-55 minutes, or until thoroughly warmed through to the center. This method is excellent when you need to reheat several burritos simultaneously or prefer a slightly crisper tortilla exterior.
With these methods, you’ll always have a delicious, ready-to-eat breakfast waiting for you!
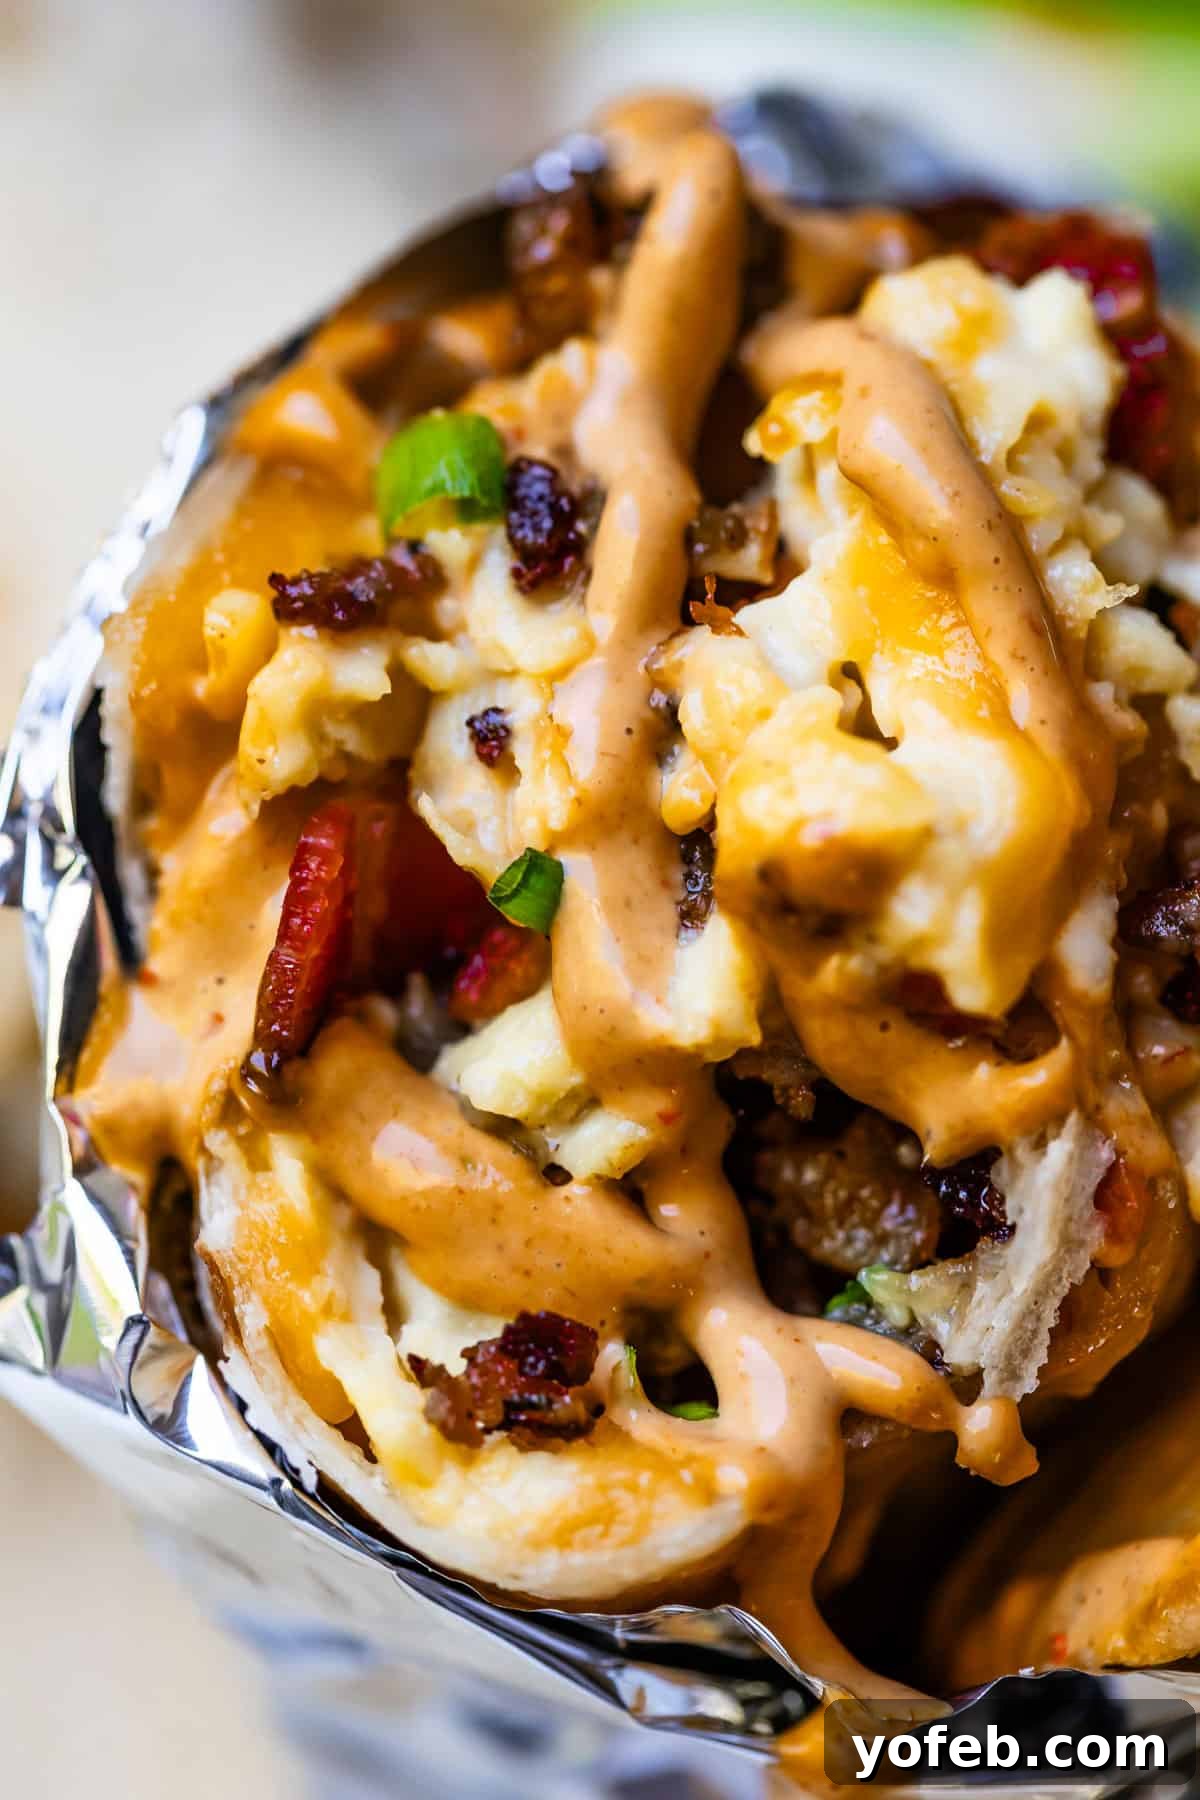
Frequently Asked Questions About Breakfast Burritos
Breakfast burritos are incredibly versatile, but most recipes, including this one, feature scrambled eggs and cheese as their base. Beyond that, common additions often include a type of potato (like shredded or cubed hash browns, or roasted potatoes) and a breakfast meat such as sausage, bacon, or ham. However, there are no strict rules! You can get creative by adding cooked vegetables like bell peppers, onions, spinach, or mushrooms, or incorporate beans for extra protein and fiber. Feel free to mix and match ingredients to suit your personal preferences and dietary needs.
The healthiness of a breakfast burrito largely depends on its ingredients. This particular recipe aims for a balanced meal, providing protein and healthy fats from sausage, bacon, and eggs, along with carbohydrates from the potatoes and tortilla to fuel your day. To boost the nutritional value, you can easily add a variety of cooked vegetables, which increases micronutrients and can lower the overall calorie density. Serving your burrito with a side of fresh fruit is also a great way to add vitamins and natural sweetness, making it a well-rounded and satisfying meal.
While flour tortillas are generally recommended for their pliability and larger size, you can certainly use corn tortillas if you prefer their flavor. Keep in mind that corn tortillas are typically smaller and less flexible, making them more prone to cracking when folded. To minimize this, warm them thoroughly before assembly, and consider using two corn tortillas per burrito for extra structural integrity and to better contain the fillings. Be mindful not to overstuff them.
There are many ways to add heat! You can incorporate diced fresh jalapeños or serrano peppers into your scrambled eggs or sauté them with your sausage. Using a spicy cheese like Pepper Jack is another excellent option. For sauces, a generous amount of hot sauce, sriracha mayo, or a spicy salsa will definitely turn up the heat. You can also mix a pinch of cayenne pepper or chili powder into your egg mixture.
While cream cheese is highly recommended for creating exceptionally creamy eggs in this recipe, you can still make delicious burritos without it. The key is still to cook your eggs very slowly over low heat to prevent them from becoming dry or rubbery. You could try adding a tablespoon of sour cream or Greek yogurt to the eggs for a touch of richness, or simply focus on the slow-cooking method to achieve the softest possible texture.
More Delicious Breakfast and Brunch Ideas
Whether you’re looking to explore alternatives to burritos or plan to feature these incredible make-ahead burritos as part of an expansive breakfast smorgasbord, here are even more amazing ideas to inspire your morning meals!
Savory Breakfasts to Savor
- Best Breakfast Casserole Recipe with Sausage >> All your favorite breakfast elements baked into one comforting dish – perfect for holidays and feeding a crowd!
- Easy Quiche Recipe with Bacon and Spinach >> Simple to make, incredibly flavorful, and oh-so-satisfying – did we mention bacon?
- Grilled Cheese Eggs Benedict with Bacon and Hollandaise Sauce >> This is the ultimate indulgent breakfast; a truly spectacular dish for those “go big or go home” mornings.
- Overnight Biscuit and Gravy Casserole >> Enjoy comforting, home-style cooking with this convenient casserole that you can prepare the night before.
- Savory Oatmeal from A Couple Cooks >> A unique and healthy twist on a breakfast classic, packed with umami flavors.
- California Breakfast Stuffed Sweet Potatoes from One Lovely Life >> A naturally sweet and wholesome option, loaded with nutritious fillings.
Sweet Breakfasts to Indulge In
- Easy French Toast Recipe (Caramelized) >> Prepare yourself for the best (and never eggy!) French toast you’ve ever tasted – it’s a game-changer!
- Best Waffle Recipe from Scratch >> A timeless, classic recipe that has been a family favorite for over a decade, consistently delivering perfect waffles.
- Best Pancake Recipe EVER >> An incredibly easy recipe that consistently yields pancakes superior to anything you’d find at a restaurant!
- The Best Scone Recipe I’ve Ever Made >> Experience delightful scones that are perfectly crispy on the edges and wonderfully tender in the middle.
- Cherry Turnovers from Budget Bytes >> Flaky pastries filled with sweet cherry goodness, a delightful treat.
- Hawaiian French Toast Casserole from Tastes Better From Scratch >> A tropical-inspired casserole perfect for feeding a crowd or for special occasions.
Facebook | Pinterest | Instagram

The Only Breakfast Burrito Recipe You Need
Equipment
-
Food processor
-
Large skillet
Ingredients
- 1 & 1/2 pounds bacon, thin slice
- 1 pound bulk breakfast sausage
- 1 & 1/4 pounds cheddar cheese, shredded at home
- 30 ounces frozen shredded hash browns
- 1/3 cup bacon grease, from the bacon you just cooked (maybe more)
- 1/2 cup butter, or more (1 stick; for the hash browns)
- Generous kosher salt, for the hash browns
- Black pepper, for the hash browns
- 1/2 cup green onions, chopped
- 4 ounces cream cheese, chopped into chunks
- 15 large eggs
- 1 & 1/4 teaspoons Lawry’s Seasoning salt, or kosher salt
- 1 teaspoon black pepper
- 1 teaspoon onion powder
- 1/4 cup butter, for the eggs
- 15 (10-inch) flour tortillas, warmed (burrito size)
To serve:
- 1 batch Chipotle Mayo
- Avocado, sliced
- Restaurant style salsa, homemade or store-bought
- Cilantro, optional
Instructions
-
Bake your bacon: For an easier process and consistent crispiness, bake 1 and 1/2 pounds of thin-sliced bacon. Arrange bacon in a single layer on one or two baking sheets and bake at 400 degrees F for 10-18 minutes, or until very crisp. Baking allows you to cook a larger quantity with less effort and less mess than stovetop frying.
-
Once crisp, transfer the bacon slices to a paper-towel lined plate to cool. Crispy bacon is crucial for burritos, as it holds up better in a “soggy environment.” Once cooled, chop the bacon into bite-sized pieces.
-
Save the bacon grease: This is an essential step! Carefully pour the rendered bacon grease into a heat-proof jar or bowl. It will solidify as it cools and can be stored in the refrigerator for future use. This liquid gold is perfect for cooking your hash browns and adding flavor to other dishes.
-
Brown the sausage: In a large skillet, cook 1 pound of bulk breakfast sausage over medium-high heat for about 5-8 minutes, breaking it up with a wooden spoon until fully cooked and no longer pink.
-
Optional crispy sausage bits: For extra texture and flavor, push most of the cooked sausage to the side of the pan. Spread a thin layer of sausage bits over the center of the pan and cook undisturbed for 1-2 minutes until crispy and lightly browned. Scrape these to the side and repeat with any remaining sausage. Once cooked, set aside to cool.
-
Shred the cheese: For the best melting and binding properties in your burritos, I highly recommend shredding your cheddar cheese at home. A food processor with a shredding attachment makes this quick and easy, but a box grater works too. Pre-shredded cheese contains anti-caking agents that prevent it from melting as smoothly, which can affect the overall texture of your burrito.
-
Cook the hash browns: Heat a large 12-inch skillet over medium-high heat. Add 2 tablespoons of the saved bacon grease and 2 tablespoons of butter, swirling to coat the pan.
-
Do not thaw the frozen shredded hash browns. Add about 2 cups of hash browns to the hot pan. Spread them out evenly and then firmly pack them down into a solid patty using the back of a spatula or measuring cup. Season generously with kosher salt and black pepper.
-
Allow the hash browns to cook undisturbed until the edges are golden brown and crispy. If any areas appear dry or are cooking too quickly, add a small pat of butter directly on top; it will melt down and re-lubricate the pan.
-
Flip and finish hash browns: Instead of stirring, carefully flip the hash brown patty like a pancake. You may need to cut it into smaller sections with a spatula to make flipping easier. Add more butter or bacon grease if the pan looks dry. Continue cooking undisturbed for another 3-4 minutes on medium-high heat (reduce to medium if it starts to smoke) until both sides are crispy and browned.
-
Remove the cooked hash browns to a plate and repeat the process in 3-4 batches until all 30 ounces are cooked. Using two large skillets simultaneously can speed this up. Avoid overcrowding the pan, as this prevents crisping. Let the hash browns cool completely before assembly.
-
Prepare the eggs: Chop 1/2 cup of green onions and set aside. Chop 4 ounces (half a block) of cream cheese into small chunks.
-
Crack 15 large eggs into a large bowl. Add 1 and 1/4 teaspoon Lawry’s Seasoning salt (or kosher salt), 1 teaspoon black pepper, and 1 teaspoon onion powder. Whisk vigorously for longer than you think necessary, until the eggs are frothy and bubbly. This aeration helps create fluffy, tender eggs. A stand mixer with a whisk attachment or a hand mixer can make this easier, but a good old-fashioned whisk works perfectly if you put in the effort.
-
Use the same 12-inch skillet used for the potatoes (ensure any burnt bits are wiped out; clean completely if it’s not a non-stick pan). Heat the pan over medium-high heat for about 2 minutes until hot. Add 1/4 cup (half stick) butter and allow it to melt, but do not let it brown.
-
Pour the whisked eggs into the hot pan all at once. Immediately reduce the heat to low. Use a silicone spatula to gently scrape the bottom and sides of the pan, continuously moving the eggs. Cook these eggs SLOOOWWWWLY – this is the secret to keeping them incredibly soft and tender, which is crucial for burritos that will be reheated. Overcooked eggs become rubbery when reheated, so patient, slow cooking now prevents that. You can increase the heat to medium-low if cooking takes too long, but prioritize slow cooking.
-
When the eggs are partly set but still have significant liquid parts, add the cream cheese chunks. Continue cooking and stirring gently, allowing the cream cheese to melt and incorporate into the eggs. Even if some small chunks remain, they will be delightful in the burrito.
-
Remove from heat when barely set: This cannot be stressed enough: take your eggs off the heat when they are BARELY SET. They should look soft and wet, with no sloshy liquid, but still very moist – much softer than you would typically cook scrambled eggs if eating them plain. They will continue to cook slightly from residual heat and set up a bit more. This extremely moist texture ensures they remain tender when reheated, preventing dry, rubbery burrito fillings. Soft eggs also help bind the other burrito components together.
-
Stir the chopped green onions into the cooked eggs. If you’re a true cheese fanatic, a final sprinkle of cheese over the eggs is always a welcome addition. Allow the eggs to cool completely before assembling your burritos, especially if freezing them.
-
Warm the tortillas: To prevent cracking and make them pliable for folding, warm your tortillas. You can stack them on a plate, cover with a damp paper towel, and microwave for 30-60 seconds, or follow the instructions for melting cheese below.
-
Assemble the burritos: Create an efficient assembly line with all your cooled ingredients: warmed tortillas, shredded cheese, hash browns, eggs, bacon, and sausage. The closer to room temperature your fillings are, the better, as this minimizes condensation and potential sogginess.
-
Optional cheese barrier: For extra insurance against a soggy burrito, sprinkle 3-4 tablespoons of shredded cheese evenly over one warmed tortilla (not in a single line). Microwave the tortilla on a plate for 20-30 seconds until the cheese is nearly melted (but avoid over-microwaving to prevent drying out the tortilla). This creates a protective barrier between the tortilla and any wet ingredients. After each tortilla, wipe any condensation off the plate before adding the next one.
-
Add fillings: Starting with your cheese layer (melted or not), create a line of hash browns down the center of the tortilla. Directly on top of the hash browns, add a layer of the creamy scrambled eggs. Next, layer the chopped bacon and then the cooked sausage.
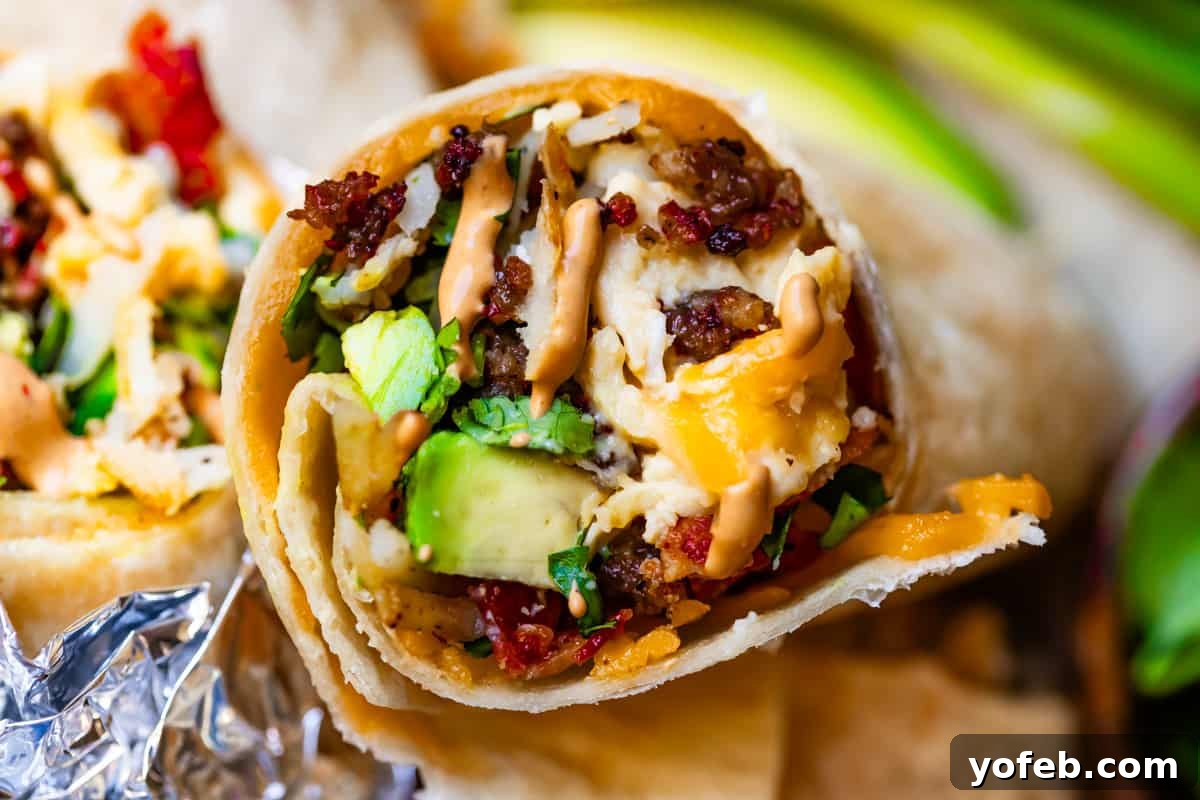
If you are eating these burritos right away, now is the time to add a layer of sliced avocado, a sprinkle of fresh cilantro, and a generous dollop of Chipotle Mayo and/or salsa, spreading them out as desired.
-
Fold your burrito: To fold securely, first fold the short side edges of the tortilla inwards, over the ends of the filling line. Then, take the bottom edge of the tortilla (closest to you) and fold it firmly up and over the filling, tucking everything in with your thumbs. Make one more small fold with each side piece, tapering them inward like the top triangle of an envelope (but not too pointy), then roll the burrito upwards and away from you until it’s tightly sealed. Refer to the provided photos if you are new to this technique for clear visual guidance.
-
Garnish your burritos: It’s an absolute culinary crime to eat these burritos without proper garnishes! My top recommendation is rich Chipotle Mayo, paired with a generous serving of fresh Restaurant Style Salsa. Sliced avocado or creamy guacamole also makes an excellent addition, adding fresh flavor and texture.
Consider Garlic Aioli for a savory boost, perhaps with a pinch of chili powder or finely chopped jalapeños. Fresh Pico de Gallo combined with cool sour cream offers another fantastic, fresh, and zesty topping option.
-
Wrap your burritos for storage: If you are not serving these immediately, wrap each cooled burrito tightly in aluminum foil. Use a 12-inch square of foil. Place your tightly rolled burrito baby near the bottom edge, parallel to it. Fold the short ends of the foil up over the ends of the burrito, molding it snugly to cover the ends. Then, roll the burrito upwards until it is completely sealed in the foil. (See photos for visual guidance.) If you’ve made burritos with different fillings, use a permanent marker to clearly label each one.
-
Refrigerate your burritos (short-term): If you plan to eat your burritos within 12 hours, wrap them individually in plastic wrap and then store them in an airtight container or ziplock bag in the fridge. To reheat, remove the plastic wrap and foil (if used), then microwave on high for 1-2 minutes, or bake in an oven at 350 degrees F for about 8-10 minutes until warmed through.
-
Freeze your burritos (long-term): For longer storage beyond 12 hours, freeze your burritos. After wrapping each cooled burrito in foil, place them in a single layer on a baking sheet and flash freeze for 30-60 minutes. Once firm, transfer the foil-wrapped burritos to a large gallon-sized ziplock freezer bag. This extra bag helps prevent freezer burn and keeps them fresh for up to 3 months.
-
Reheating from frozen:
Microwave: Unwrap the frozen burrito completely, removing all foil and plastic wrap. Wrap the burrito in a damp paper towel and place it on a microwave-safe plate. If your microwave has a defrost button, use it for 3-5 minutes. Alternatively, cook on power level 5 (or 50% power) for approximately 3-5 minutes. About halfway through, you may want to carefully slice the burrito in half and wrap each half in a damp paper towel, continuing to microwave until heated through. Stay nearby and check every 30 seconds or so, as microwave times vary. Avoid overcooking, which can lead to a hard, cardboard-like tortilla.
Oven: Preheat the oven to 350 degrees F. Place the foil-wrapped (remove plastic wrap!) and completely frozen burritos on a baking sheet. Bake for about 45-55 minutes, or until the center is thoroughly warmed. This is an excellent option for reheating several burritos at once, ensuring they are hot and ready to serve for a crowd.
Video
For a visual guide on making these delicious breakfast burritos, you can find a comprehensive video tutorial by searching for “The Only Breakfast Burrito Recipe You Need” on YouTube or your preferred video platform. The video demonstrates each step, from preparing the ingredients to mastering the folding technique, ensuring your burritos turn out perfectly every time.